Create a member
There are three ways to create a member:
1/ From the list of members
Enter his name in the field “Search or create a member” located at the top of the window. Click on “Create member” or press the “Enter” key on your keyboard.

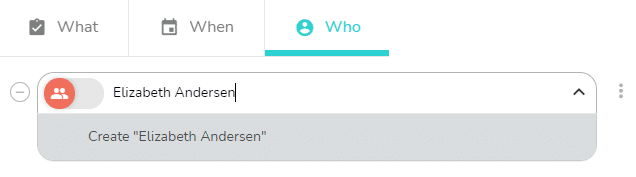
2/ From the Who tab of a task
In the “Who” tab of the detail of the task: enter the member’s name you want to create in the « Search or create a member » field, then click on “Create …” or press the “Enter” key on your keyboard.
3/ From the project settings
Click on the 

Once the member has been created, you can click on it to access its file. Only the first name/last name is mandatory. The other information is optional. To learn more about this subject, consult the article Member profile.
Invite a member to collaborate
The “Invite” button is available only when the email address of the member you want to invite is filled in.
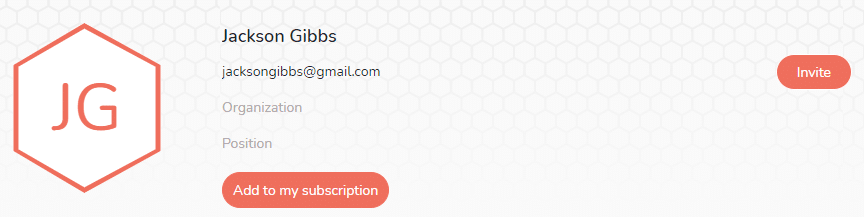
When you invite a member, they receives a notification to the email address you have filled in. When the invitation is pending, the hexagon surrounding the contact’s initials appears dotted, then when the member has accepted your invitation, the hexagon is a solid line.
You can manage members without inviting them first and decide to invite them later.
Note: First Name/Last Name and Position information will be changed by the member’s actual data when the member confirms your invitation.
Create a resource
You can also create a member, not indicate an email address and not invite them, in the case where, for example, you need to integrate a resource into your organization without it necessarily being linked to a real Beesbusy account (and to a real person).
For example :
- A member can be a generic person (customer, supplier…) who does not necessarily have access to Beesbusy
- A member can be a person who does not yet have an account (for example a trainee who will arrive in the future)
- A member can be a meeting room, a company vehicle or a machine. By assigning the resource to certain tasks, you can view their availability
You can create as many members as you want.