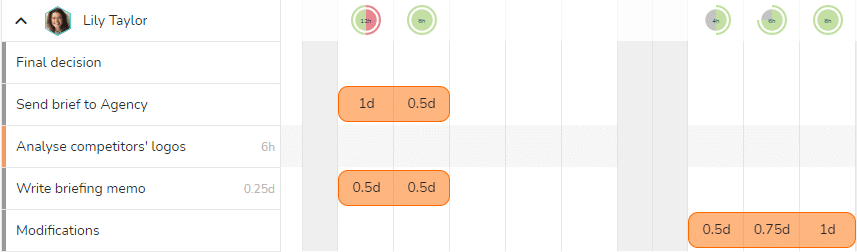
This view allows you to display and organize your tasks in a timeline for each member. On the line corresponding to each member, you see the tasks assigned to them.
You can also directly allocate workload to a member and view their occupancy rates per day.
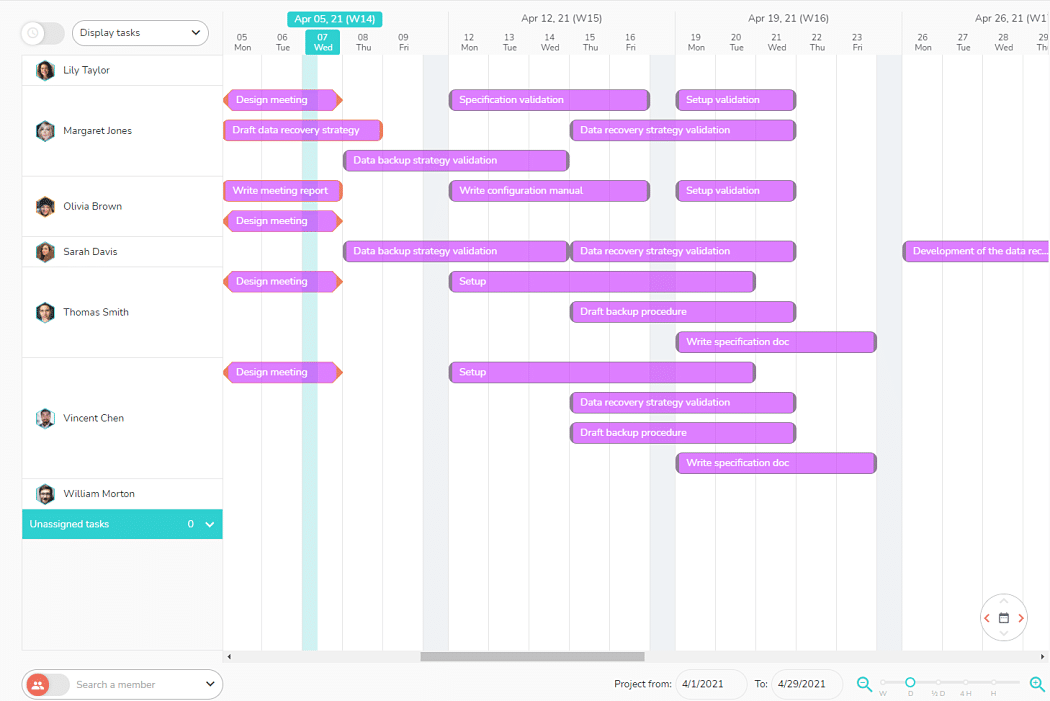
In the Who view, you can:
- Plan a project
- Schedule a task
- Reschedule, extend or shorten the duration of a task
- Display and and assignment of tasks
- View unassigned tasks
- Assign unassigned tasks
- Display task status
- Display overtime
- Times display
- Schedule workload
- View occupancy rates
- Share a project
- Timesheet display
- Change display settings
Plan a project in the Who view
Note: changes made in one view are automatically carried over to the other views of the project (What and When).
Schedule a task
You can directly schedule an existing task (not yet scheduled) in the schedule. The task appears in the schedule in gray (opposite the name of a member if it is assigned, or in the “Unassigned tasks” category at the bottom of the schedule if not).
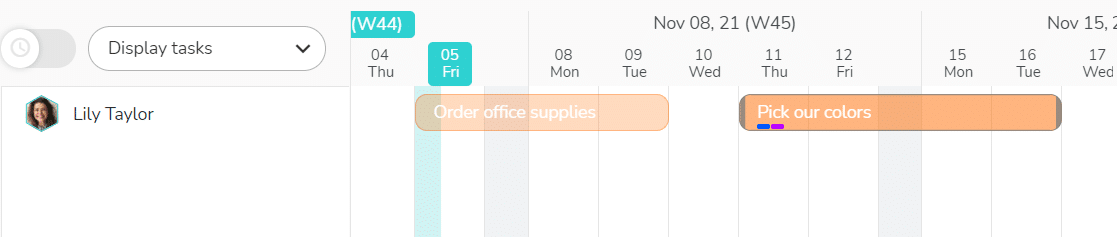
Click on the task directly in the schedule and move it to the desired date to schedule it.
You can also click on the task, then click on the When tab of the task details window. You can then add the dates, times and duration.
Reschedule, extend or shorten a task
To modify the duration or dates of a task directly in the schedule:
- To reschedule a task, use drag-and-drop.
- To extend or shorten a task, position your cursor at one end of the task and use the handles to change the duration.
If this modification affects one or several linked tasks, these tasks are automatically moved. If a milestone task prevents moving, this limit is indicated by a red zone.
To modify the duration or dates of a task in the task details panel: click on a task in the schedule to display the task details window, go to the When tab. You can then change the dates, times and duration.
Note: in the Who view, you can view the links and milestones, but you must go to the When view to modify them.
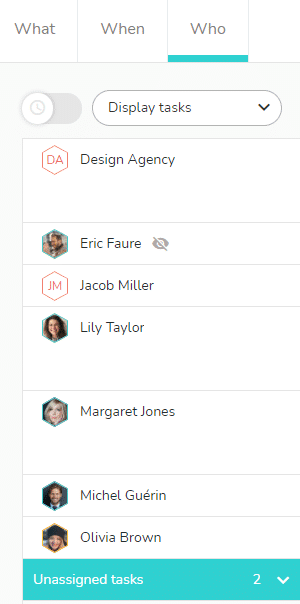
Display and assignment of tasks
View unassigned tasks
You can view the list of project members in the column to the left of the planning. Below this list is an “Unassigned tasks” panel. The number indicates how many tasks are included in this category. Click on the panel to open it and display the tasks in the schedule.
Assign unassigned tasks
To assign an unassigned task to a member, click and drag the task to the row of the member to whom you want to assign the task.
To assign the task to several members, click on the task in the planning to display the detail, then in the Who tab, make your modifications. See the article on task assignment to learn more.
Drag and drop a task to change the assignment
To move a task from one member to another, click on the task and drag it to the line of the member to whom you want to assign the task.
If the original member has marked achieved time in the task, or if he/she has completed one or more actions, the task is dupicate in order to keep track of what has been done (time or action): it remains assigned to the original member who has completed something, and is assigned to the person to whom you have put it.
To assign the task to several members, click on the task in the schedule to display its details. Then in the Who tab, make your changes. See the article dedicated to the assignment of tasks to learn more.
Display task status
A color code is used to display the status of tasks according to their schedule:
- Red: late
- Orange: in progress
- Gray: coming soon
- Green: finished
Display overtime
When the time logged on a task exceed its scheduled duration, the excess is materialized in the form of hatches.

Times display
Schedule workload
By selecting “Display timelogs” in the « Who » view, you can schedule workload to a member.
For each member, you have the time slots (corresponding to the duration of the task) on which you can schedule their workload. These time slots are shown by colored areas (the color of your project).
View occupancy rates
The occupancy rates are visible on the member’s line and correspond to the member’s occupancy rate per day on all the projects on which the member is assigned. In workload planning, the occupancy rate allows you to see if a member is available and for how many hours, but also if you have planned too much workload for them.
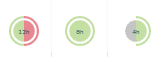
Occupancy rate colors :
- Green : planned workload
- Grey : available workload
- Red : workload exceeding the length of the member’s day
Share a project
Below the list of members, you can select a new member to add to the project from the “Search a member” drop-down menu. Type the member’s name if the member does not exist in your list of members, it will be automatically created and added both to your list of members and to the list of members who share the project.
Use the 

Timesheet display
You can use the toggle 

Visit this article dedicated to the display of time to learn more.
Change display settings
- Use the filters

- Use the calendar icon

- Adjust the zoom level with the slider and the icons


- Project >


