You have the option of sharing a project with members and managing their access rights.
Share a project
You can access the sharing settings of project in different ways:
- Left sidebar menu > Project name > Click on the 3 dots

- Project>

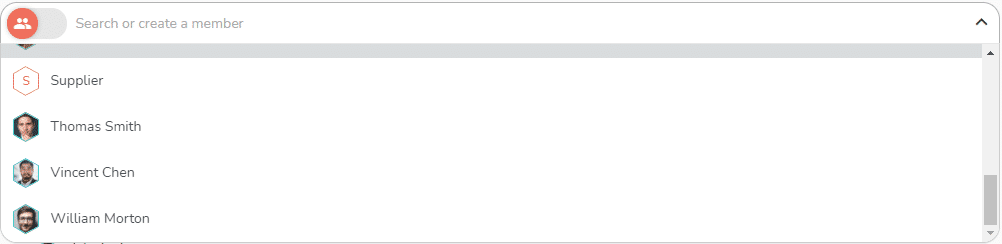
- Project > Who view: Under the list of members on the left, you can select a new member to add to the project from the “Search a member” drop-down menu.


Share a project with members
Type the member’s name in the “Find or create a member” field. If the member does not exist in your list of members, it will be automatically created and added to the list of project members.
Share the project with the members of a smart-tag
You can share the project with multiple members at once using smart-tags.
To do this, click on the 


A window opens and you can adjust the sharing: configure the access rights of each member of the smart-tag, or choose to not share the project with certain members of the smart-tag.
Visit the article dedicated to smart-tags to find out more.
Note on project sharing : Members will receive a notification informing them of the sharing and the project will be added to their list of projects (except in the case of “no access rights, see below).
Manage authorizations
Also in the “Collaboration on project” section, you can assign access rights to each member. These access rights are applicable to the project.
- “No access”: The member does not have access to the project, and doesn’t receive any notifications regarding the project. This status can be used when you want to include their contribution to this project without sharing the project with them or when you want to organize your project before sharing it.
- “Read-only”: The member can add comments , validate their actions and log their own time, but they can not create a task or modify the schedule. He can also download from Beesbusy an attachment added by another member.
- “Limited read-only”: the member can only see the project tasks assigned to him and has read-only rights on them.
- “Modification”: The member can edit and create a task, attach a document or edit a task schedule or a workload planification. But he cannot invite other members or manage the rights of existing members, nor duplicate or archive a project.
- “Limited modification”: the member can only see the project tasks that are assigned to him and has modification rights on them.
- “Administrator”: The member has every rights, including inviting members, duplicating the project or archiving it.
The “Creator” status is assigned by default to the creator of the project and can not be modified.
Members’ authorizations can be changed at any time.
Note on project sharing: If you have joined a project of which you are not the creator (another member has shared the project with you), it is possible that some members of the project are not included in the list of members with whom you collaborate (they don’t appear in your member list and you can’t share other projects with them). You can invite them directly to collaborate by selecting one or more members and clicking on “Invite“.