Planner is a planning application from Microsoft 365.
Beesbusy has implemented the Planner import to facilitate the import of your project data from Planner.
Import a plan
To import a plan, you must first “Export plan to Excel” from Microsoft Planner.
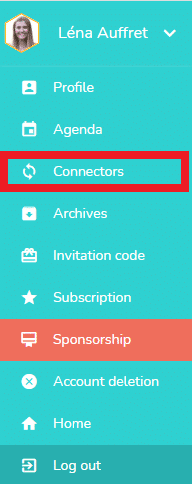
Then, in Beesbusy, go to the menu on the top right of your screen and click on “Connectors”:
When you are in the connectors page, scroll down and open the Planner section:
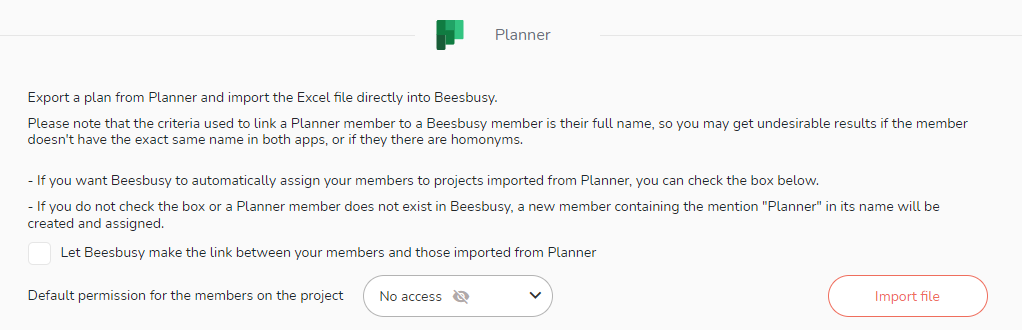
Before proceeding to the import of the Excel file generated from Planner, you must choose between two types of import:
- An import that will make match the project resources of the Excel file with those of Beesbusy, according to their names (automatic assignment). Therefore, the imported tasks will be directly assigned to your existing members in Beesbusy.
- An import that will generate a virtual resource in Beesbusy for each resource present in the Excel file. In this case, the imported tasks will be assigned to virtual members generated in your members list and labelled “Planner”.
Assign tasks to your existing members in Beesbusy
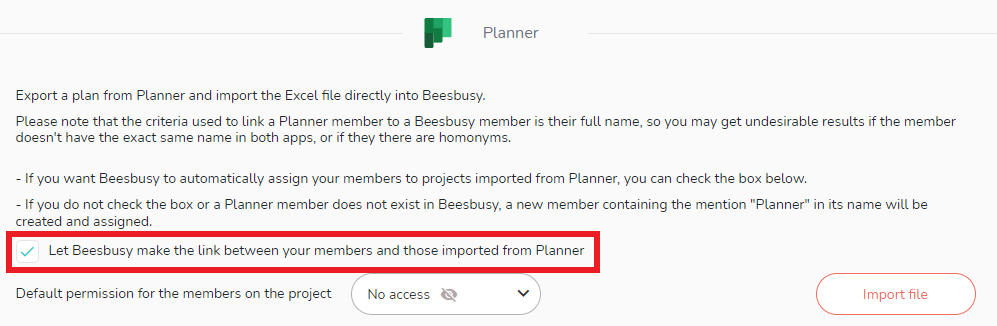
In order for Beesbusy to make the link between your members and those imported from Planner, simply check this box:
Warning: Please note that the criteria used to link a Planner member to a Beesbusy member is their full name, so you may get undesirable results if the member doesn’t have the exact same name in both apps, or if there are homonyms.
When you import a plan, you generate a project in Beesbusy. Therefore, in case your members are already existing in Beesbusy, you will have to assign them rights on the generated project.
For more information on access rights, see the online help.
Assign tasks to virtual members generated during import
If you do not check the box presented above, the members present on the Plan tasks will be generated as virtual members in Beesbusy.
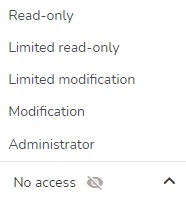
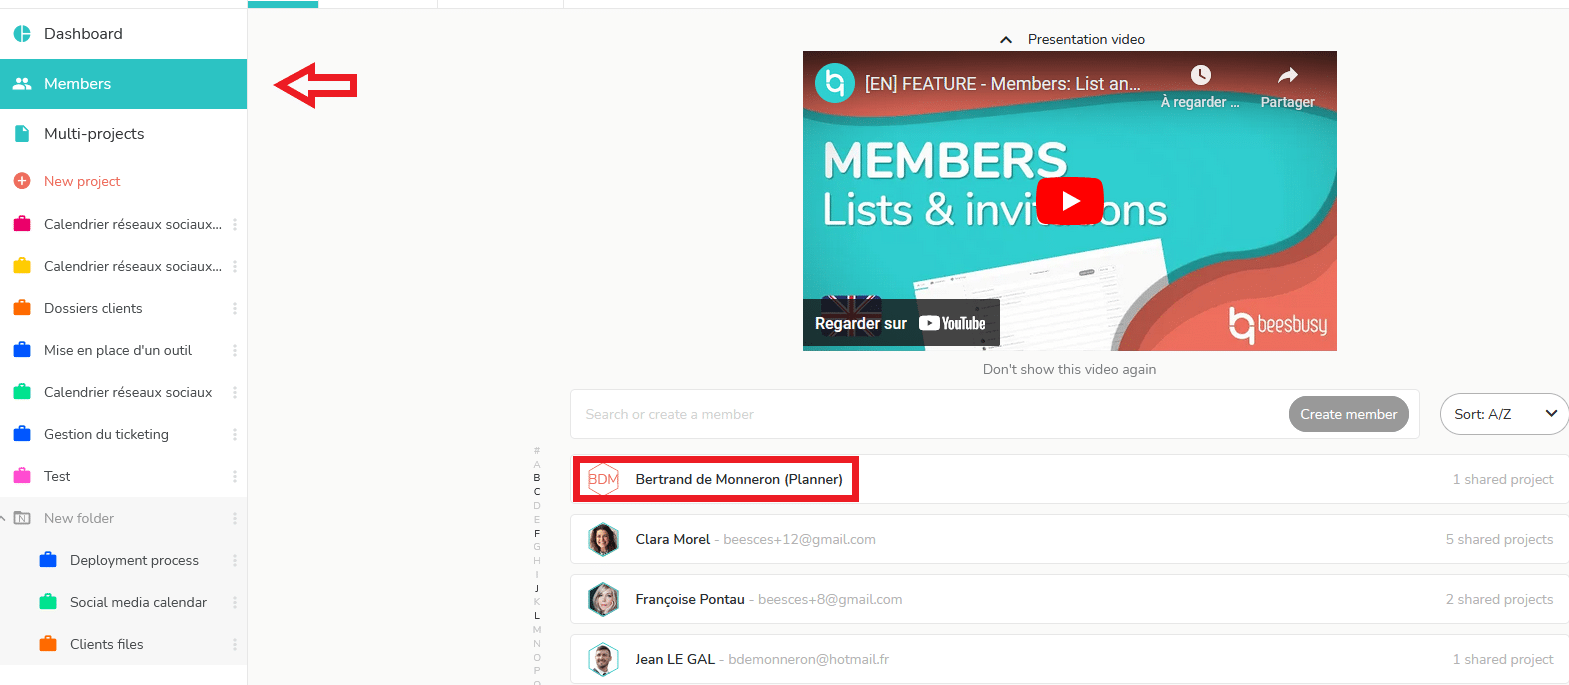
Here is how the virtual members generated during the import are represented:
By default, the rights assigned to these members on the project generated in Beesbusy will be “No access”.
Import the chosen file
Once you have defined your import options, you just have to click on the import button:

Choose the Excel file you have exported from Planner. As soon as it is ready, a buzz will be sent to you.

Here are the elements of the Excel file and their correspondence in Beesbusy:
- Task ID (A): is not included in Beesbusy. Beesbusy generates its own unique numbers.
- Task name (B): is included in Beesbusy.
- Compartment name (C): is taken over by Beesbusy. It becomes the name of a task list.
- Progress (D): is partly taken over in Beesbusy: completed tasks are marked as completed in Beesbusy.
- PriorityPriority (E): is not included in Beesbusy.
- Assigned to (F): is included in Beesbusy: it is the assignment of tasks to members.
- Created by (G): is included in Beesbusy: it is the name of the creator of the task, visible in the What tab of the task.
- Date of creation (H): is included in Beesbusy. It is visible in the What tab of the task, with the name of the creator.
- Start date (I): is included in Beesbusy. It is the start date of the task, visible in the When tab of the task.
- Due date (D): is included in Beesbusy. It is the end date of the task, visible in the When tab of the task.
- Is periodic (K): is not included in Beesbusy.
- Overdue (L): is recalculated in Beesbusy. If the end date is passed while the task is not finished, it will be considered as ” Overdue” in Beesbusy.
- The end date (M): is taken over in Beesbusy. It is the date that is indicated in the What tab of the task when it is changed to “Completed” status.
- Executed by (N): is included in Beesbusy. This is the name of the member who has set the task to “Completed” status, visible in the task’s What tab.
- Checklist items done (Y): not included in Beesbusy.
- Checklist items (P): included in Beesbusy as actions.
- Note: the items of the completed checklist do not allow to know which items have been completed. Therefore, Beesbusy creates the actions corresponding to the checklist items, but none of these actions will be considered as completed.
- Labels (Q): are included in Beesbusy.
- Description (S): is included in Beesbusy as a pinned comment.