General presentation
The agenda is a overview of all the tasks to which a user is assigned. It is presented in a monthly format, with the tasks positioned on the days.
To see your agenda, go to the user drop-down menu (top right, Agenda tab).

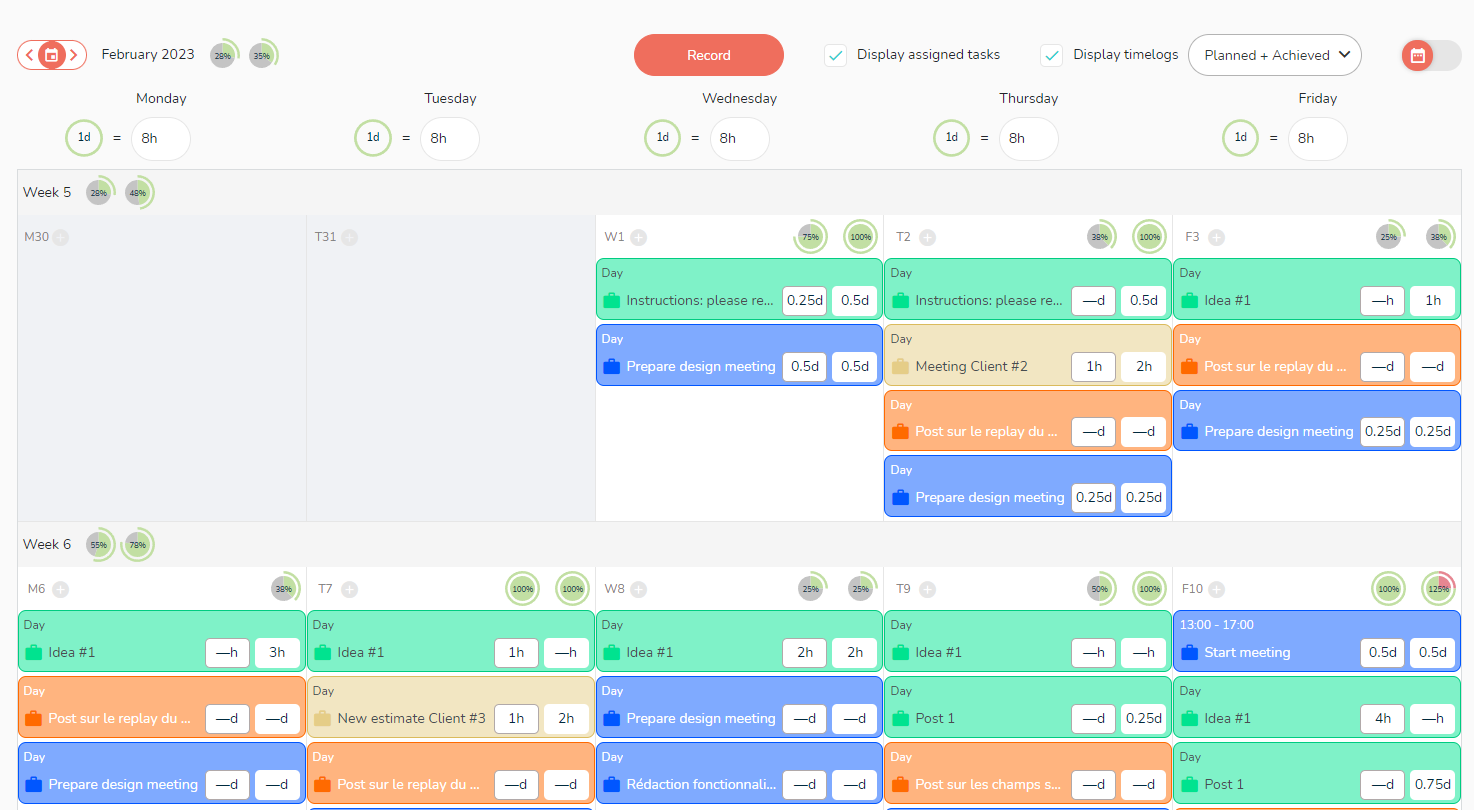
This is how your agenda looks like:
Editing a task
Click on a task in your calendar to open it and have access to the details of the task: you will be able to modify it and add content to it.
Calendar view settings
- You can move from month to month in the calendar by using the arrows around the calendar icon at the top left.
- At the top right of the calendar there is another calendar image which allows you to show or hide weekends with a single click.
- At the top right of the calendar, a drop-down menu allows you to access several views: Planned, Achieved, Planned + Achieved

The content of these views is detailed below in the section “Viewing times”.
The colour of the task in the agenda corresponds to the colour of its project.
Position your mouse pointer over the name of a task to see to which project and task list it belongs, its percentage of completion, its start date, its end date, its duration and its unique reference number for your projects and tasks.
For the rest of the display options, you can also check or uncheck in the upper right corner:
- Show or hide assigned tasks: if the box is not checked, only tasks with times are visible.
- Show or hide times: if the box is not checked, times are not visible.
Time visualization
The views
The different views of the agenda:
- Planned time’s view
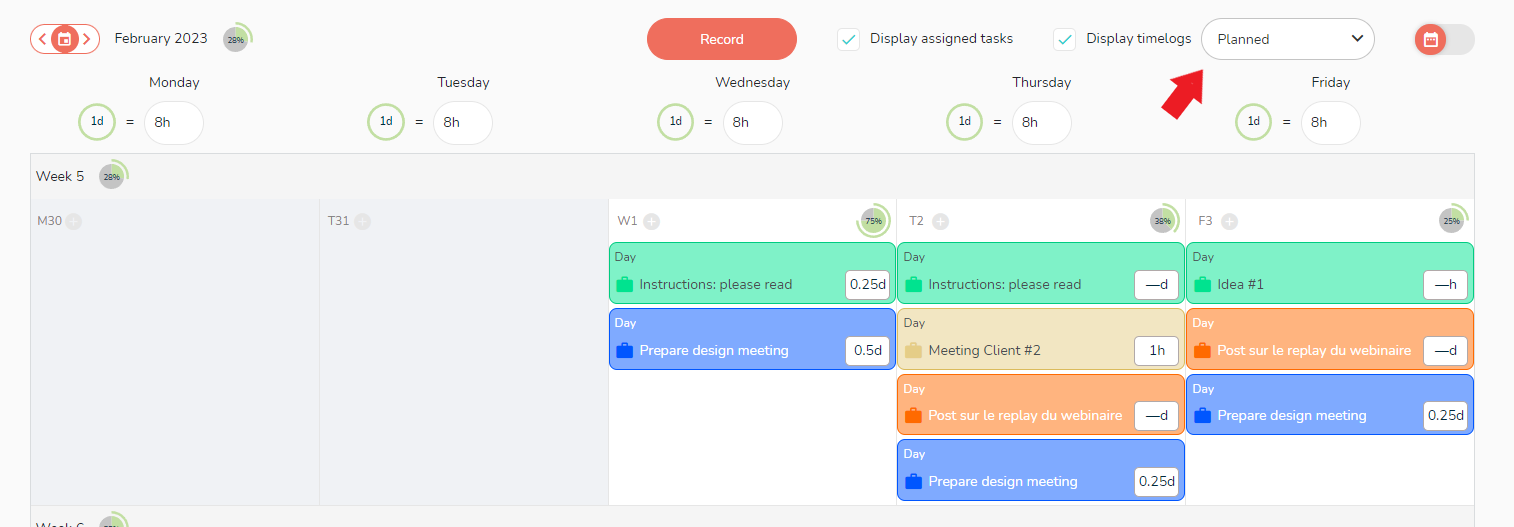
This view shows the tasks and planned times with the corresponding occupancy rates.
If the “Display assigned tasks” box is not checked, tasks without planned times are not visible.
- Achieved Times View
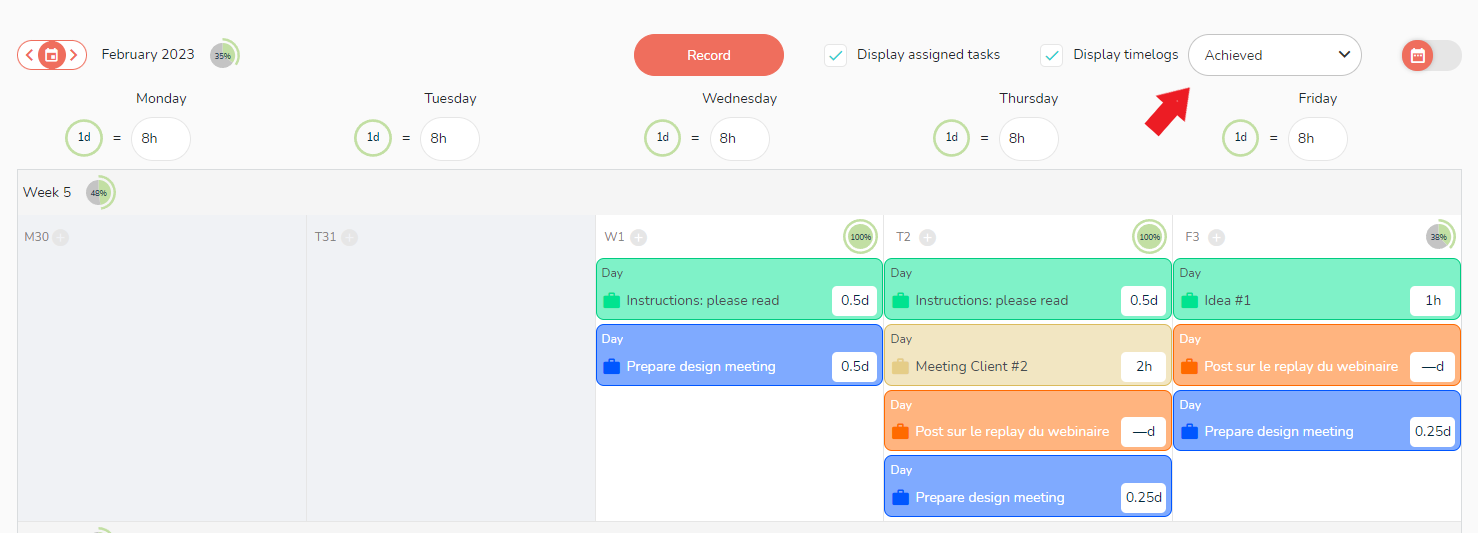
This view shows the achieved tasks and times with the corresponding occupancy rates.
If the “Show assigned tasks” box is not checked, tasks without completed times are not visible.
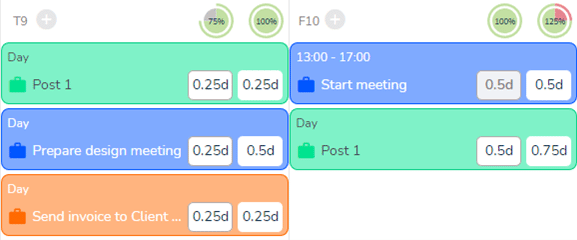
- View of planned and achieved times
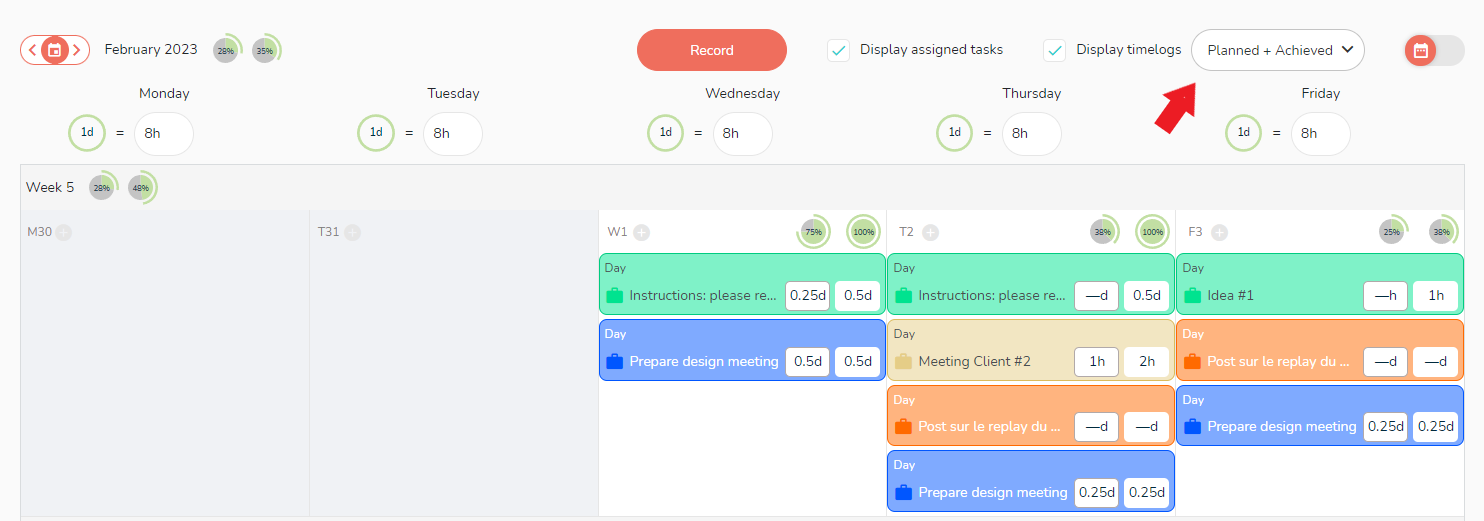
All tasks are shown here, both planned and achieved, with the corresponding occupancy rates.
If the “Show assigned tasks” box is not checked, tasks without time are not visible.
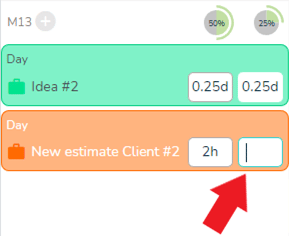
The time data on the left is the planned time, and the time on the right is the achieved time.
Good to know: when entering an achieved time, the entry field is surrounded by a blue border.
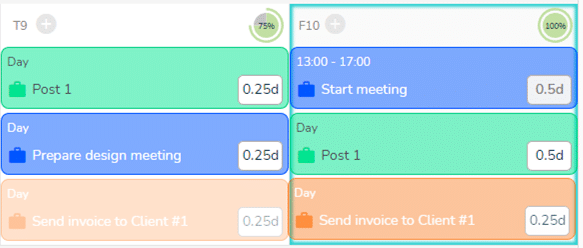
Occupancy rates
The occupancy rates are visible at day, week, and month level.
In the view of planned and realised times, there are 2 occupancy rates, one for planned times (left) and one for realised times (right).
A pictogram shows the occupied time in green and the available time in grey. This pictogram shows the percentage of time allocated (e.g. 1 day = 100%).
This makes it possible to know if the person concerned still has time available, or conversely if he/she is overloaded with work on a given day. The pictogram is coloured red to draw your attention.
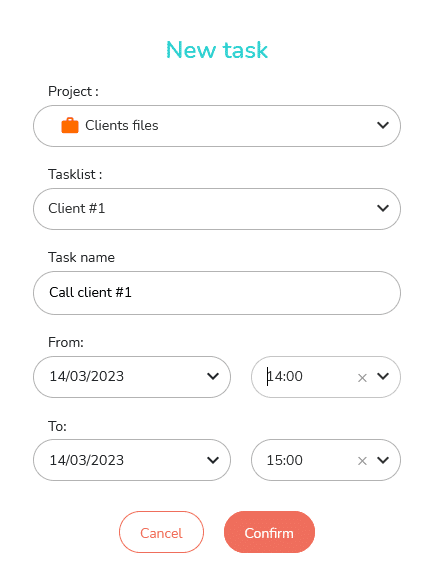
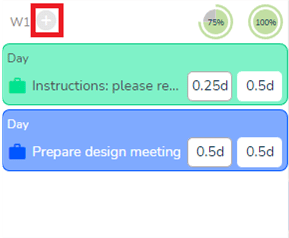
Creating a task in the agenda
It is possible to create a task from the agenda.
To do this, click on the button 
The following elements must be completed:
The task you have created is automatically transferred to the “What” view of the project.
You can also access the task creation through the button 
Record timelog and unavailability period
Moving planned times
You can move planned time by dragging and dropping, before or after the day the time was entered. A blue box will indicate that it is possible to move the selected time to the desired day:
Planned time displacement is only possible under certain conditions:
- You must have the creator/administrator status or the modification right of the project to which the task belongs.
- You must be in the planned times view of the agenda.
Be aware that scheduling constraints (link+milestone) may prevent a time from being moved.
Record your times
You can enter planned or completed time on a task in one of your projects, even if the task does not appear in your calendar (the task appears in your calendar if it is planned for the period you are viewing and if you are assigned to it).
To do this, click on the button
Fill in the time sheet that opens:
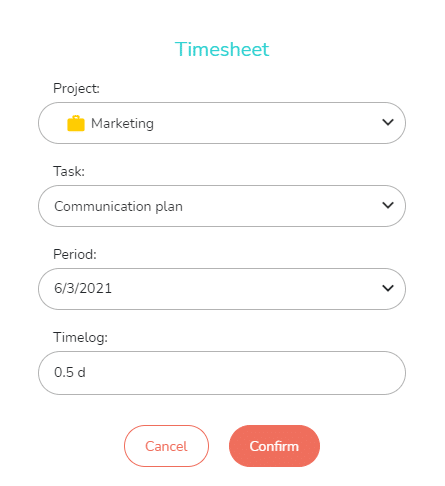
The time you have entered is automatically reported in the “Who” tab of the task and in the time summary in the different views.
You can also access the timesheet using the button
Add an off period
You can add your unavailability to your agenda by clicking on the
button, then “Offday”.
Fill in the unavailability sheet that opens:
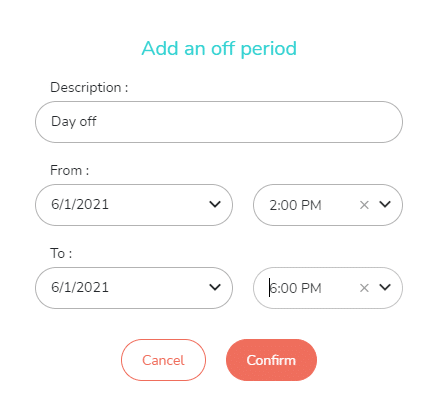
Your off period automatically generates an occupancy rate, visible in your agenda with the duration and period of unavailability.

Good to know: to view the agenda of another member, go to your list of members, click on the member you want to see, his or her agenda is in the Agenda section (See the article Member profile: https://www.beesbusy.com/en/resources/features/members/member-profile/ )
The agenda of a member does not offer the same possibilities, there is a planned time view and a completed time view.
You can see non-accessible tasks, which are tasks of a project to which you do not have access. These tasks are coloured grey.
If you are participating in a project for which you are not the administrator, and the member whose calendar you are looking at has confidential tasks to which you are not assigned, these confidential tasks will also appear under the name of “Task not accessible”, but they will be the colour of the project.
Similarly, if you are in read-only or edit-only status on a project, the tasks of that member will be named “Task not accessible”. These tasks will be the colour of the project to which they belong.

In pink: the task is part of a project you are collaborating on and where your status is limited edit or limited read only. It could also be a confidential task.
In grey: the task is part of a project you are not part of.