Add a comment to a task
You can write comments on a task to add a note, a description or any kind of information.
In the What tab of the task, enter your text in the “Write your comment…” box.
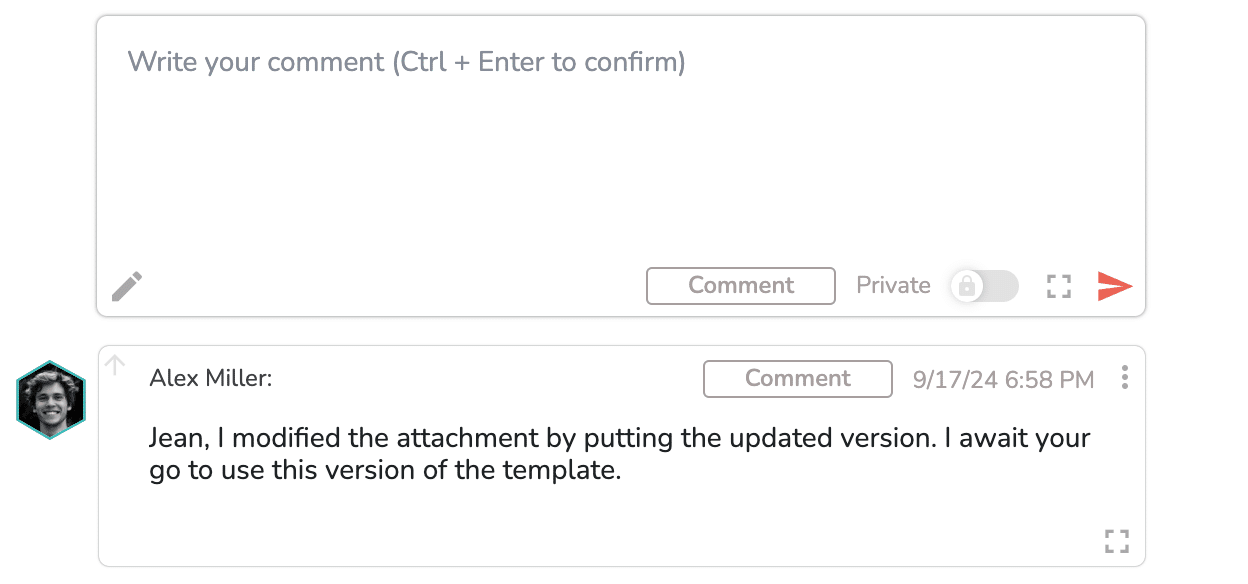
Once you’ve entered your comment, click on the arrow at the bottom right of the text box or press Ctrl+Enter on you keyboard:

Comments are displayed in their order of creation, the most recent at the top.
Add rich text
You can also enrich the text of your comment by clicking on the pen at the bottom left of the “Write your comment” box:


Once you’ve clicked on the pen, the menu to enrich text appears at the top of the box. You can remove this menu by clicking on the pen again.
The rich text tool lets you:
- Bold text elements
- Underline text elements
- Cross out text elements
- Italicize text elements
- Select text font
- Change text size
- Generate a bullet list
- Add/remove a hypertext link
- Add emojis
- Etc.
Drag and drop an image into a comment
You can integrate images of your choice directly into the comments of your tasks.
To do this, you have two options:
- Drag and drop: hold down the image and drag it into the comment area.
- Copy/paste: copy the chosen image and paste it into the comment area using the shortcut CTRL+V.
This feature is available for images in various formats: PNG, JEPG, GIF, SVG, WEBP, etc.
You can also drag & drop or copy & paste documents (other than images) into your comments. They will then appear as clickable links.
Spelling correction
When writing comments in your tasks, you can get help from a spellchecker.
This spellchecker can only work if your web browser’s spellchecker is activated. To activate it, simply click on your browser settings, select “Languages” and activate “Grammar and spelling assistance”.
Once activated, misspelled words will be underlined with a red border, and a suggested correction will be offered if you right-click on the highlighted word.
Enlarge/reduce comment entry area
You can also considerably enlarge your text area by clicking on the button![]() .
.
Edit or delete a comment
To edit or delete a comment you wrote, click on the 3 small dots to the right of the posted comment you want to edit. ![]()
Then, click on “Edit” or “Delete”.
You can only edit or delete comments of which you are the author.
Turn a comment into a buzz
The three-dot menu to the right of the posted comment also allows you to turn this comment into a buzz.
When you click “Turn into Buzz” a pop-up opens: the comment is turned into a buzz.
You can change the buzz before sending.
Create actions from the comment entry box
You can also use the comments entry box to directly create actions. In the comment box, list your actions (one line = one action), and then validate the comment. Then click on the 3 small dots to the right of the comment and then on “Transform into an action. ”.
action 1 (return)
action 2 (return)
action 3
The actions panel opens and you can assign the actions or modify them if necessary.
For more information, see the article dedicated to actions: https://www.beesbusy.com/resources/features/tasks/actions/
Note: in the What view, when a task contains a comment, an comment icon is displayed![]() .
.
And when the tasks contain an action, a lightning icon is displayed.![]()
Pin a comment
You can pin an existing comment to the top of the comments area. To do this, click on the arrow located in the top left corner of the comment: ![]()
To remove the pin from a pinned comment, click the arrow in the left corner.![]()
The comment will then be placed in the comments area according to its creation date.
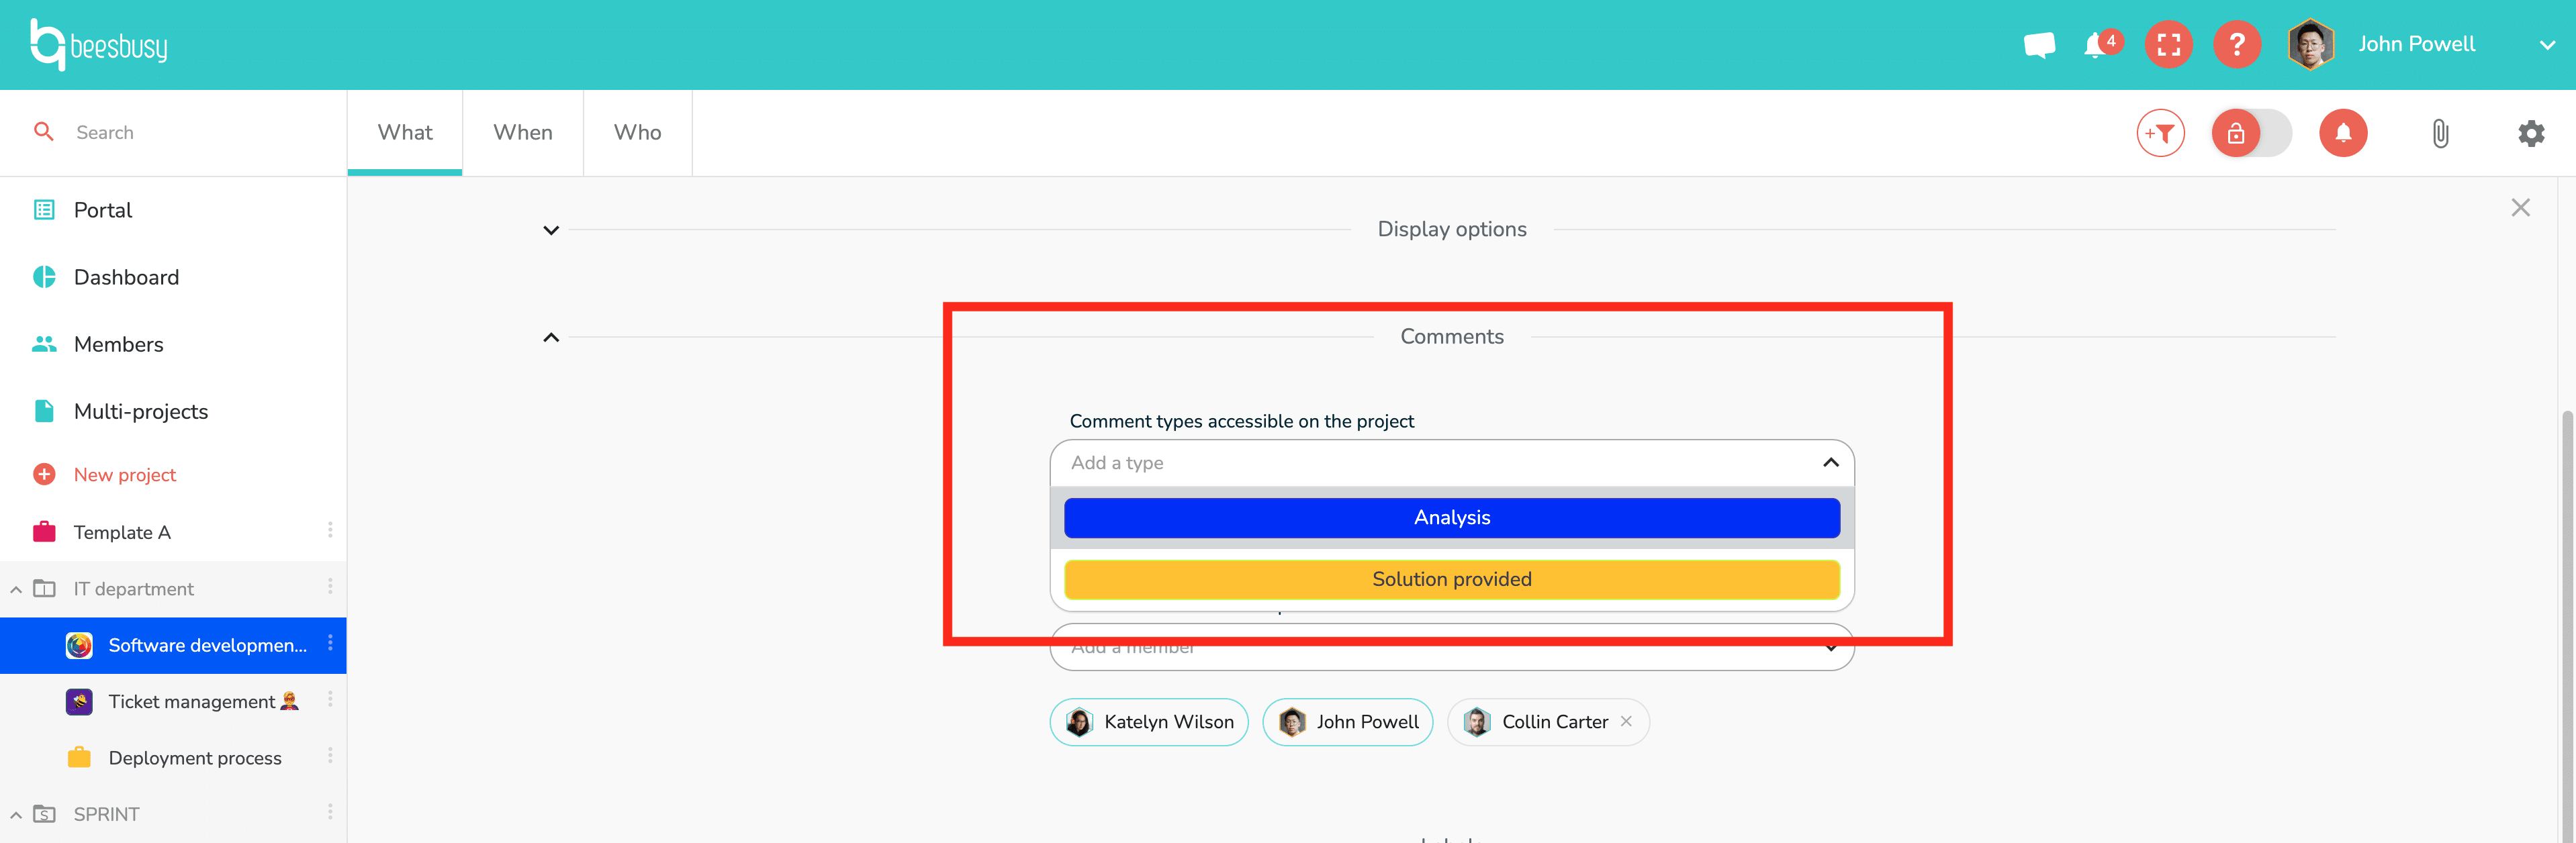
Using Description and other types of comments
You can create comment types in your subscription administrator profile settings, in a similar way to roles and special fields:

To do this, click “New comment type” and specify a color and name for your comment type.
If you create a type of comment by checking the “Unique per task’s comments” box, this will create a comment type that can only be assigned to one comment in the task. For example, here, the “Description” type, as there can only be one task description.
The Description comment type exists by default and cannot be deleted.
Then in the project settings you can choose which types of comments you want to use on your project:
This will allow you, in the tasks, to modify the type of comment via the drop-down menu that opens when you click on the name of the type:
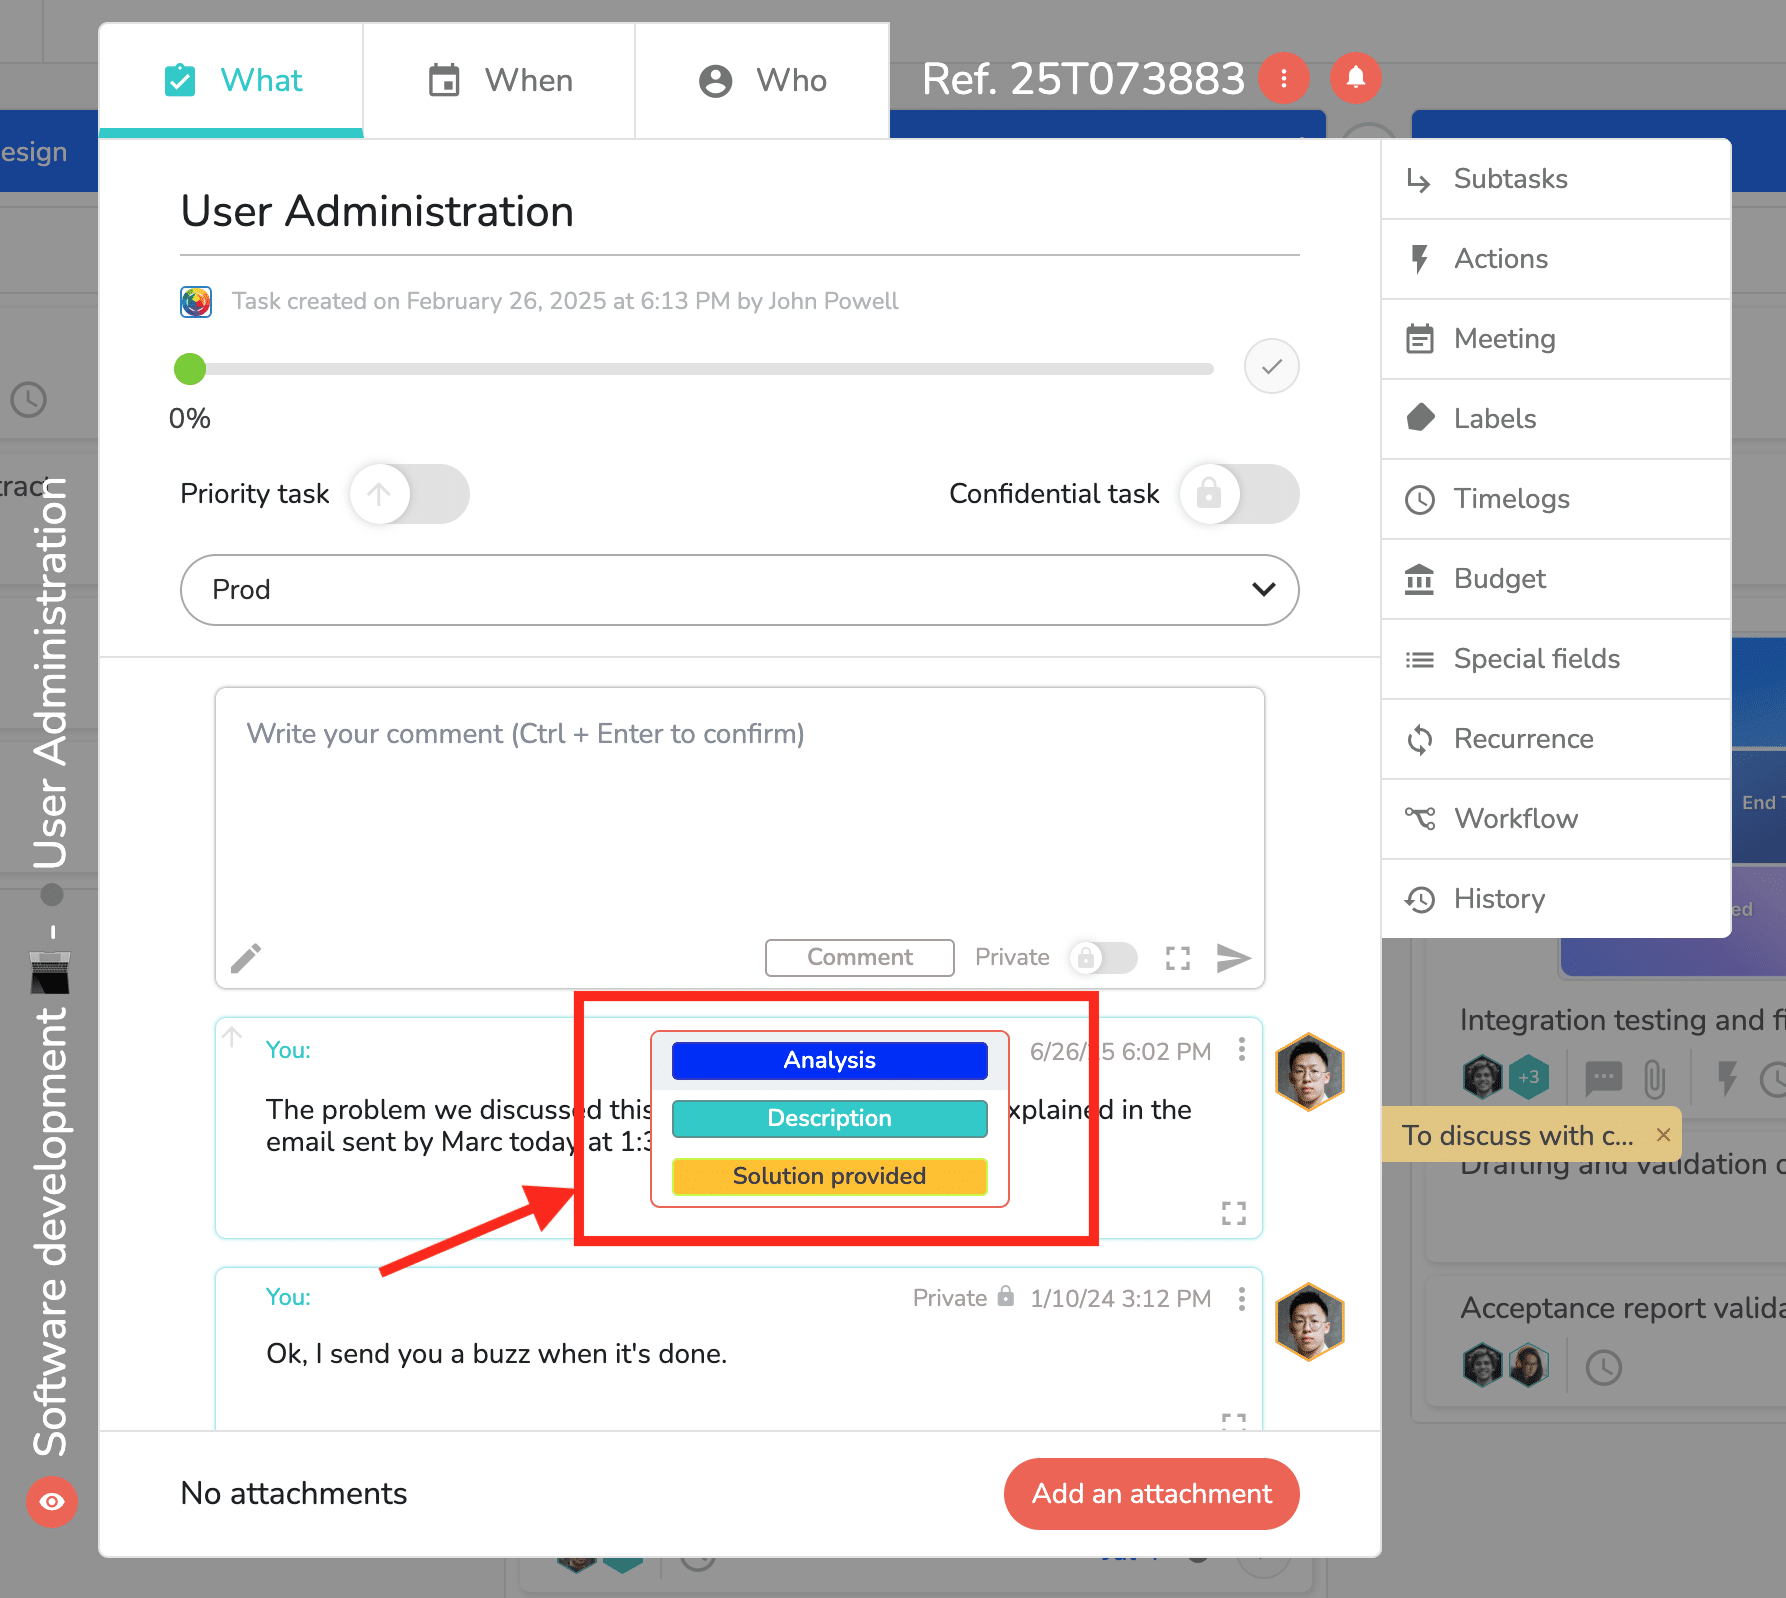
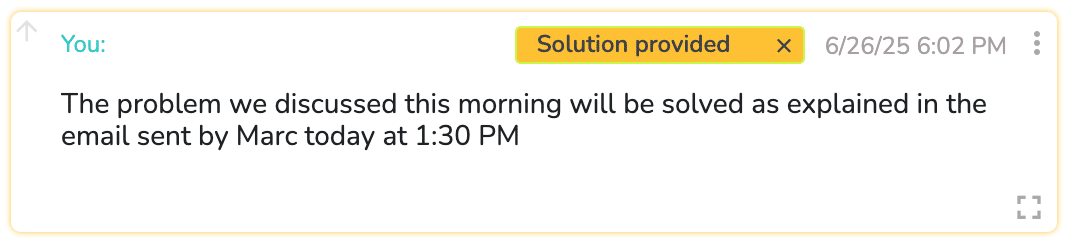
The comment with the type “Solution provided” bears the name of the type and is surrounded by the color chosen in the settings:
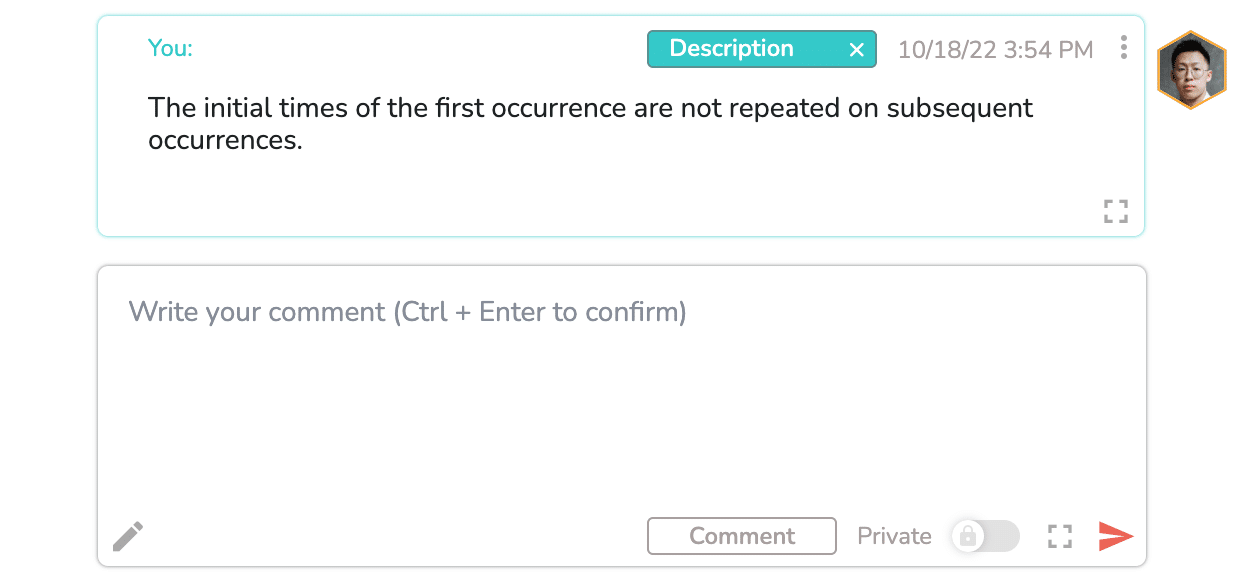
Finally, “Description” type comments are positioned above the comment entry area:
Use private comments
Turn a comment into “Private”
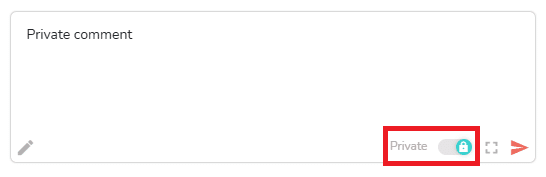
You an turn a comment into “private”, so that they are only readable by a group of members determined in the project settings.
Simply enter a comment, then, before validation, click on the “Private” button located on the bottom right of the comment box:
Choose who can access private comments
How to choose which members can read private comments?
Go to the project settings, “Display options” section.
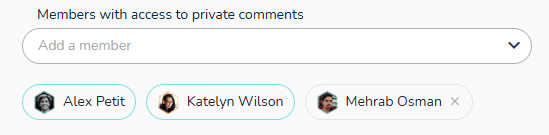
Here, a drop-down menu allows you to designate the members who have access to private comments, and the chosen members appear below:
Only members with administrator rights on the project can designate members to access private comments.
You can give access to private comments to any member of the project, regardless of their level of rights.
However, if someone has administrator rights, they are automatically positioned as a member with access to private comments. Among the members with access to private comments, you can distinguish members with administrator rights by the blue border around them.
In addition, if you remove administrator rights from a member to give them modification, read-only, etc. rights, they will be automatically removed from the list of members with access to private comments.
Finally, a member who does not have access to private comments cannot change a comment to “private” status either.