In the Who tab of the task, when you open the timelog panel of a member, there is a toggle button that allows you to chose between “Standard” planification and “Smart” planification:
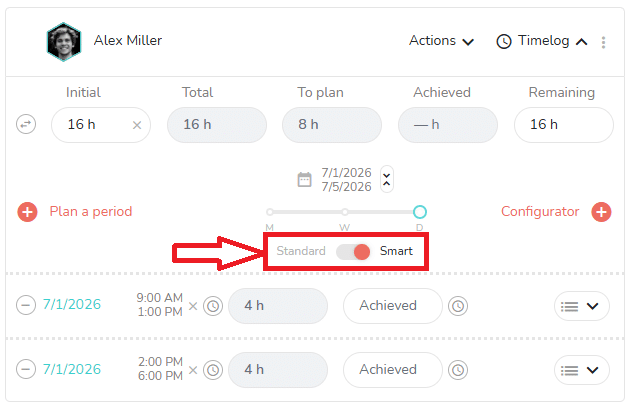
What is the purpose of the smart scheduling?
With the smart scheduling, your planning automatically considers configured daily time slots: start time, breaks, end of day…
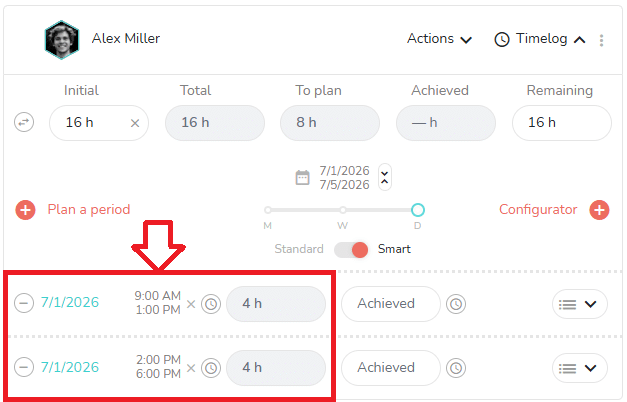
As you can see in the screenshot above, 2 timelogs have been created for the same day, the 1st of July 2026 :
- First timelog from 9:00 AM to 1:00 PM
- Second timelog from 2:00 PM to 6:00 PM
So the 8 hours planned this day has bees splited in 2 timelogs, with one hour for the lunch break between the morning and the afternoon.
This can be useful if you need:
- More accurate schedules.
- A more precise Outlook calendar if you synchronize the planned times of your Beesbusy agenda with Outlook.
How does the smart scheduling works?
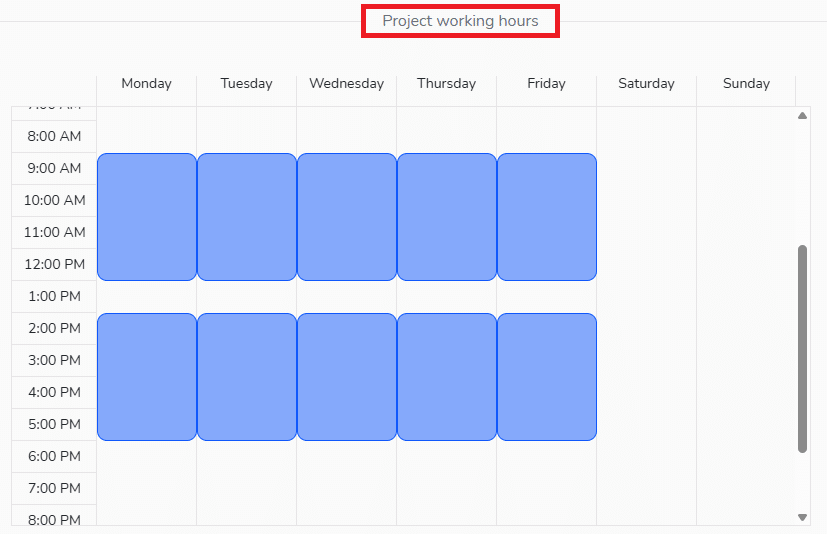
First, you have to configure the working hours of the project.
Go to the settings of the project by clicking on the gear icon at the top right 
Then go to the “Project working hours” section.
Here, you can map out the structure of each day:
When it is done, go back in the Who tab of a task, select the smart scheduling for a member, and click on “Plan a period”.
When the calendar of the member is open, select a day. Automatically, time will be planned for the member as it is configured in the “Project working hours” of the project:
Good to know: you can use the smart scheduling feature only if you plan in hours. If you want to plan in days, you have to use the standard way of planification.