You can import data from an Excel file to automatically create projects.
Download the Excel template
To download the Excel template, go the connectors page by clicking on the user drop-down menu, then choose “Connectors”.
In the Excel section, click on “Download a template”. A file downloaded on your computer, click on it to open the template. Fill this Excel template with the data to import and save.
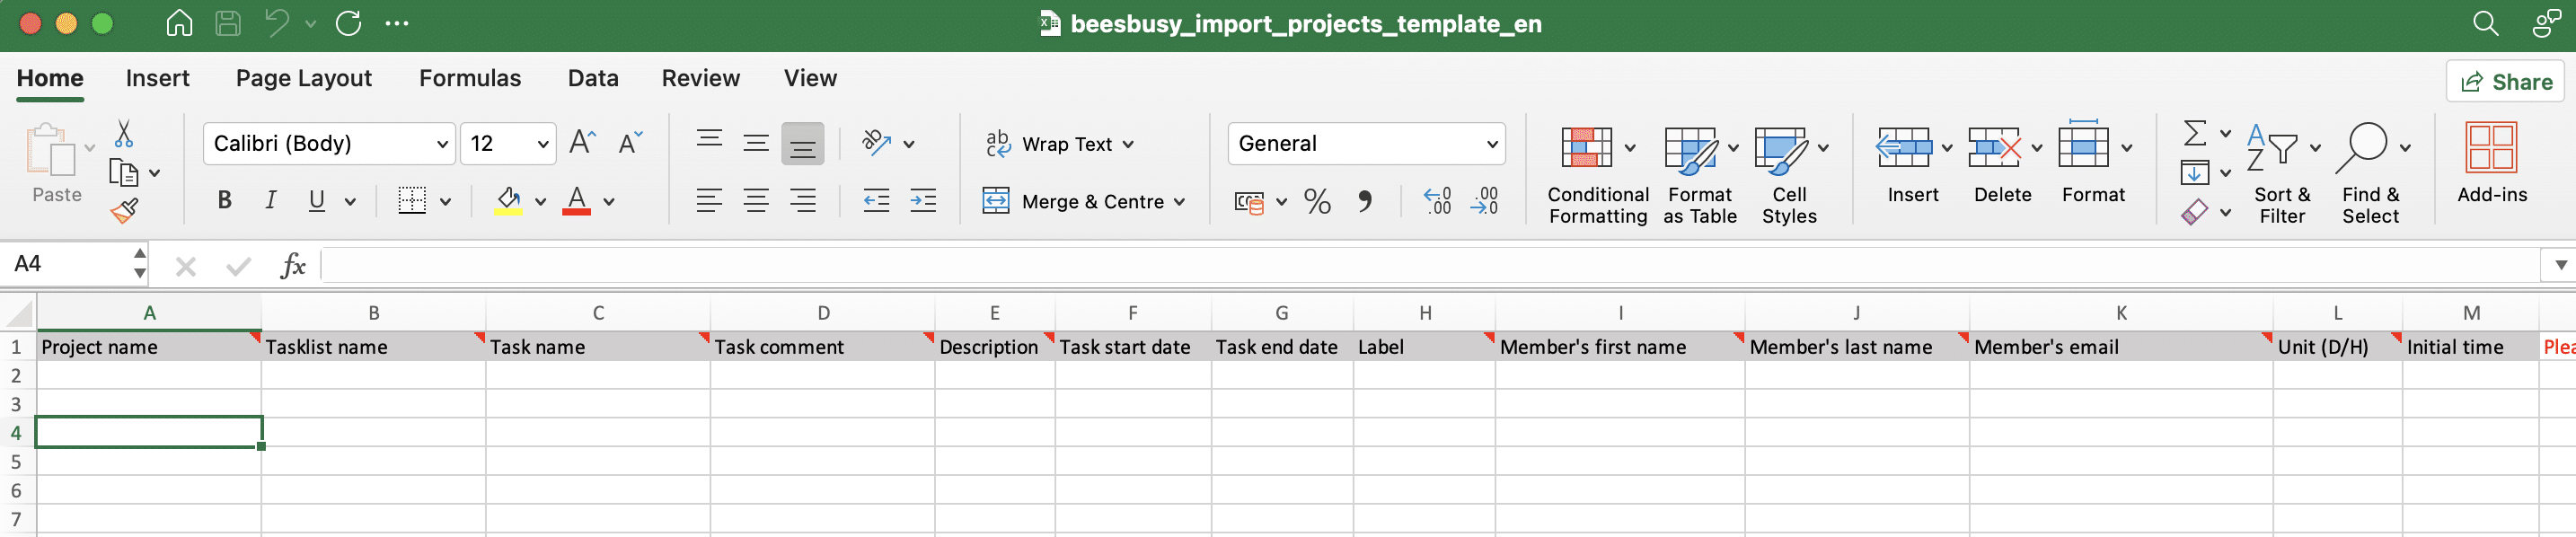
Good to know: if your project has some special fields on tasks, Beesbusy will ask you if you want to download a template that includes these specia fields. In a pop up, you will be able to choose the special fields you want to add to the template. The goal is to allow you to import in your project tasks that are already qualified thanks to the special fields.
To know more about special fields: https://www.beesbusy.com/resources/features/user-account-profile/special-fields/
Instructions for filling the template file
- Please do not delete the first row of the table.
- It is mandatory to enter each field (project, task list and task) for each row.
Example:
Project 1 – List 1.1 – Task 1.1.1
Project 1 – List 1.1 – Task 1.1.2
Project 1 – List 1.2 – Task 1.2.1
Project 2 – List 2.1 – Task 2.1.1
The template also includes instructions in the comments of the column headers:
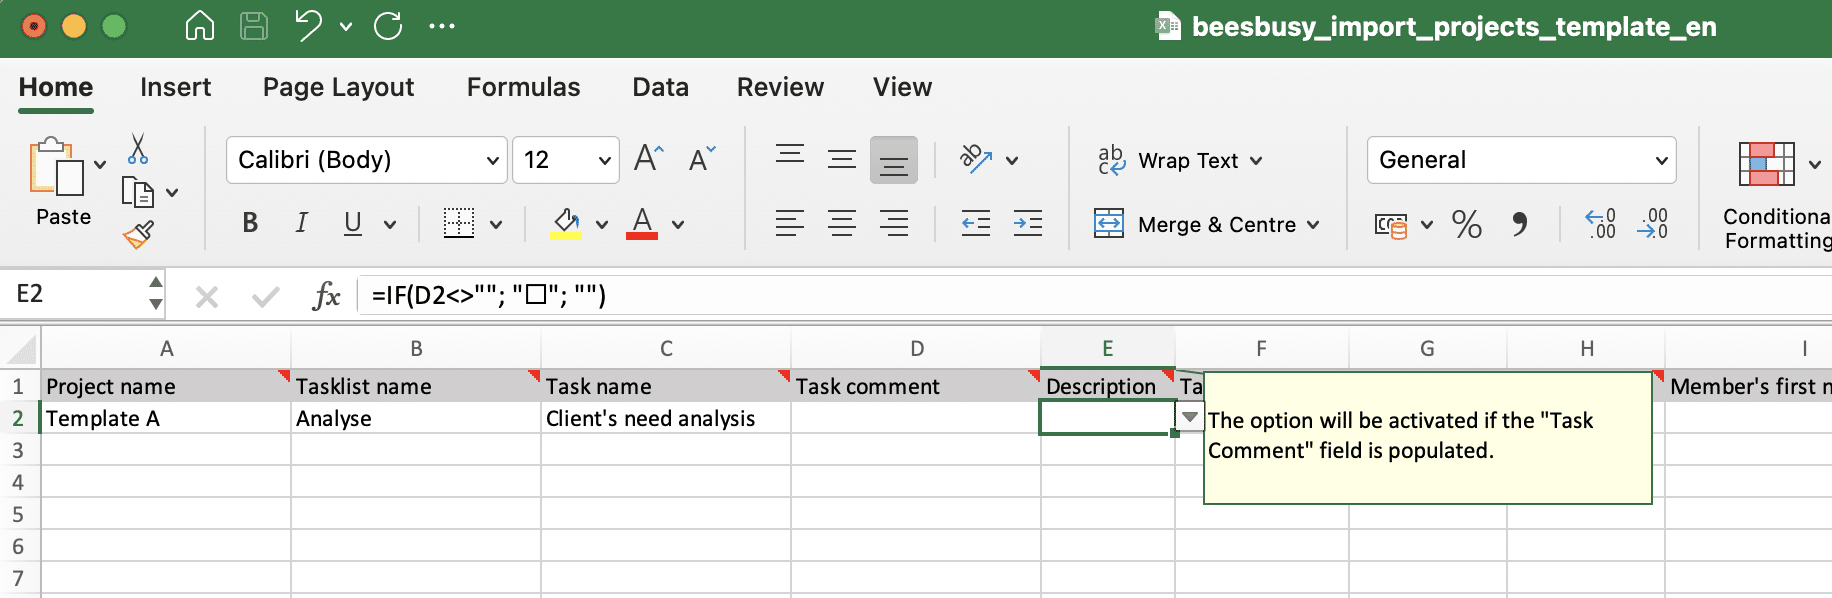
- Warning: importing an already existing project in Beesbusy generates the creation of a new project followed by a number. If you want to import data into an existing project, please see the online help article on this topic by clicking here on the following link: https://www.beesbusy.com/resources/features/connectors-synchronizations/importing-excel-into-an-existing-project/
- It is not possible to create a project or an empty list.
- In the same table, you can fill in as many projects, lists and tasks as you want. However, they must be grouped together (all the lines of the same project in succession, for example).
- The number of imports is unlimited.
- You can rename the file before import if you wish.
Import
Once your Excel file has been saved to your computer, click on “Import file”. Select the file then validate. The project(s), list(s) and task(s) are then created in Beesbusy, new projects appear at the top of your list in the menu on the left of your screen.
If you have incorrectly entered an item, an error may appear. In this case, refer to the above instructions, make the necessary corrections and start again.