What is a portal
A portal is a web page generated by the administrator of a Beesbusy subscription.
On this page, users can log in to submit requests through a simplified Beesbusy interface. Users can also track the requests they have already submitted.
On the Beesbusy side, requests are transformed into tasks within projects designed to receive them.
The link between the request and the project task allows for communication between requesters and those processing the requests, as well as real-time information synchronization.
In this article, you will first explore the portal interface, and then learn how the administrator creates and configures a portal.
Access to the portal
When users accesses the portal through their web browser using the provided URL, they arrive at a login page.
If they don’t have a Beesbusy account, they can create one here, either with a username and password or by using a SSO connector.
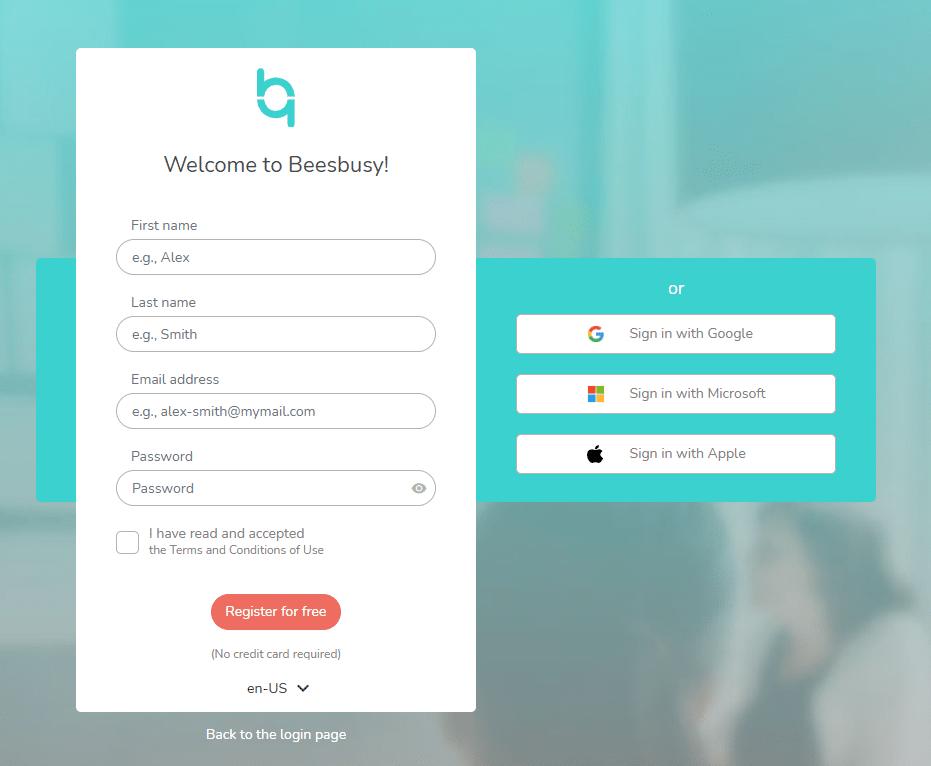
In any case, no Beesbusy license is required to use the portal: the access is free.
Make a request
In the portal, to submit a request, click the “New Task” button.
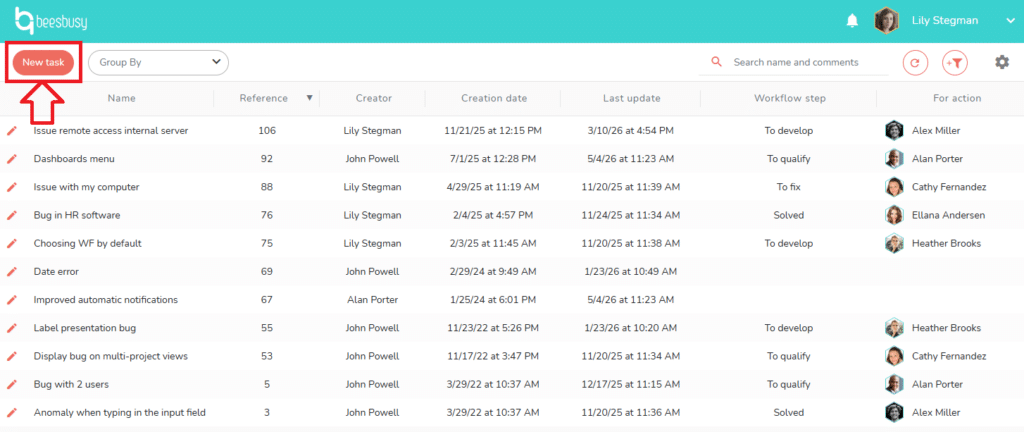
Depending on the administrator’s settings, you may be able to choose the request’s destination from the “Project” dropdown menu.
Click “Create Task” to submit the request.
Modify a request
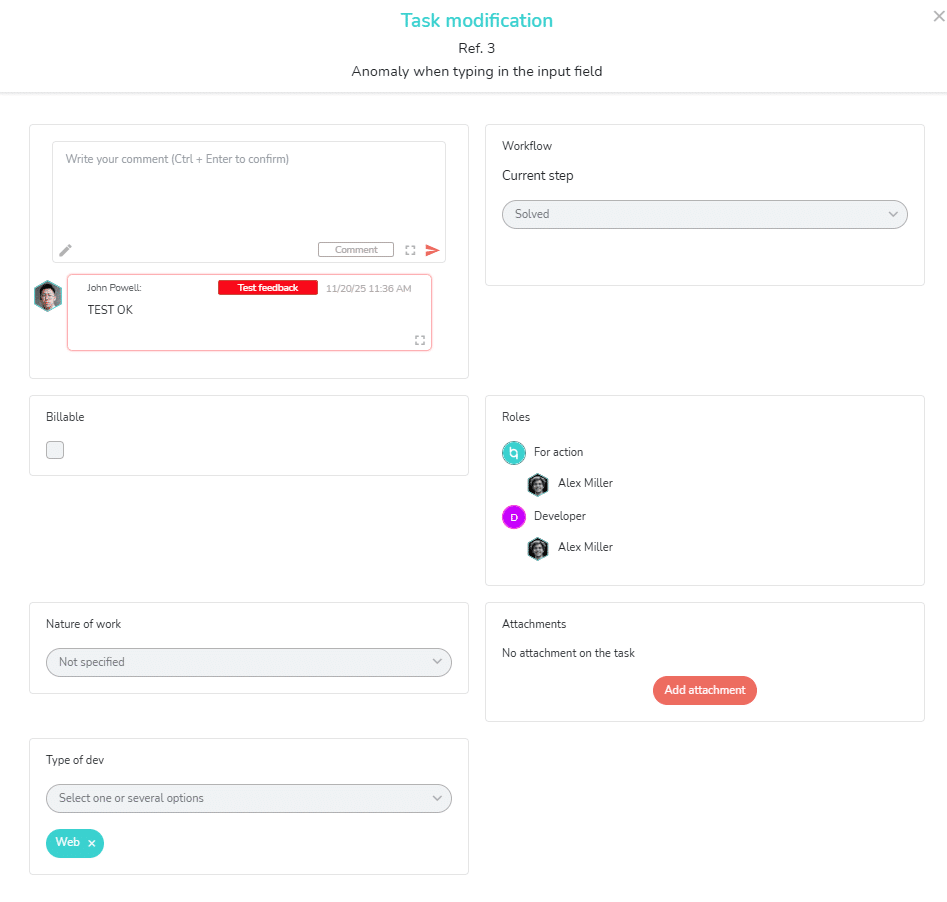
If you wish to modify a request, add information, include an attachment, etc., click the pencil icon to the left of the task name.
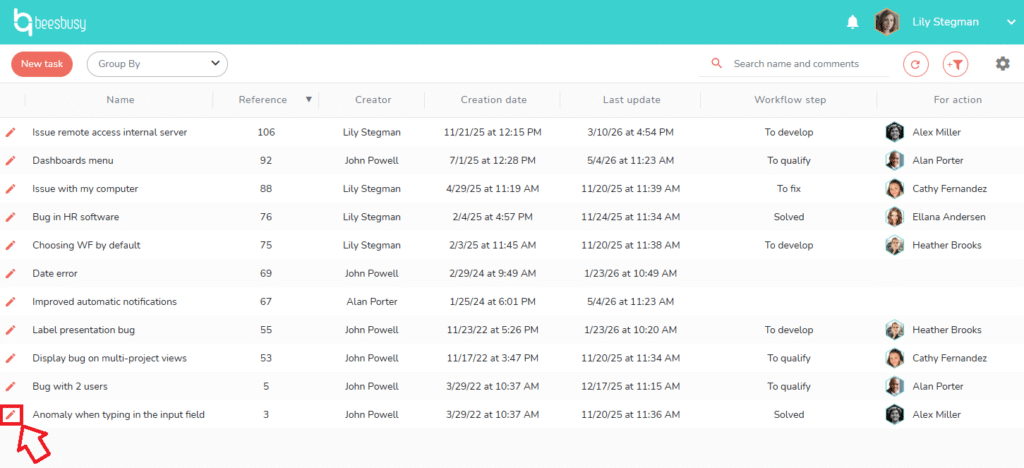
The task will open, allowing you to edit it according to the permissions granted by the administrator on the target project.
If the target project includes a workflow, roles, and/or special fields, this information will be displayed on the task.
Customize the display of portal data
Within a portal, you can customize the display in various ways.
Sorting
Click a column header to sort tasks by that criterion.
For example, if you want to see all tasks sorted by creation date, click “Creation date.”
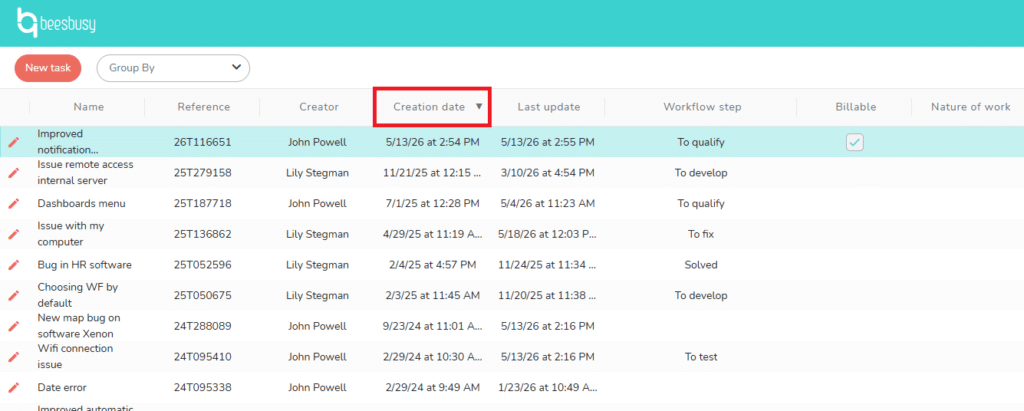
You will then see tasks sorted by creation date, with the oldest at the bottom of the list. Click the “Ceration date” column header again to reverse the order.
Grouping
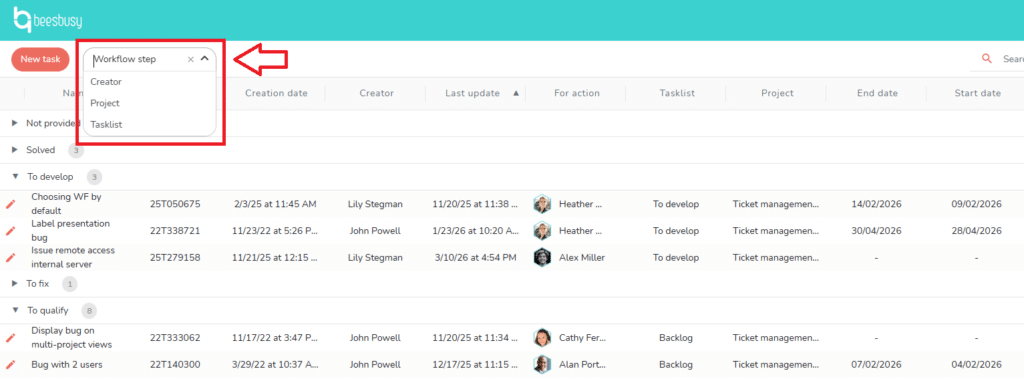
Using the “Grouping” dropdown menu, you can display tasks grouped by:
- Creator
- Task List
- Project
- Workflow step
Here for exemple the tasks are grouped by workflow step:
Filters
You can also use the filters in this view by clicking on the funnel icon in the top right corner. ![]()
To learn more about filters, you can consult the online help article on the subject by clicking here: https://www.beesbusy.com/resources/features/display/filters/
Column width
You can change the column widths by dragging and dropping the vertical lines separating the headers.
This allows you to adjust the column display to the number of columns, or to make certain information more readable depending on your needs.
Adding/removing columns
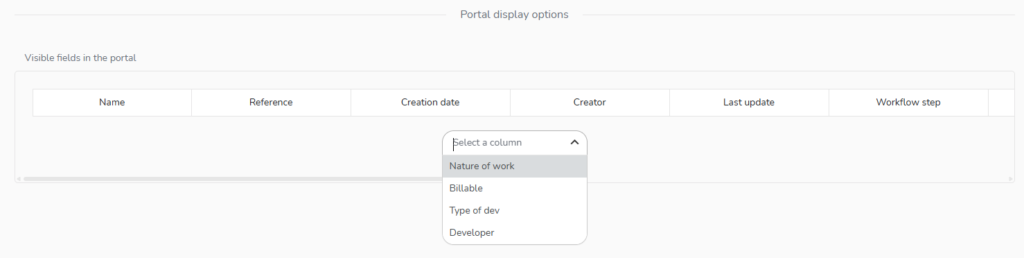
If the portal administrator has authorized it you can add columns to display additional information, such as special fields and/or roles.
How do you know if you can add columns? It’s simple: if you see a gear icon giving you access to the portal settings, the administrator has enabled this functionality. 
If you don’t see a gear icon, you cannot add columns.
When you click on the gear icon, you access the portal settings:
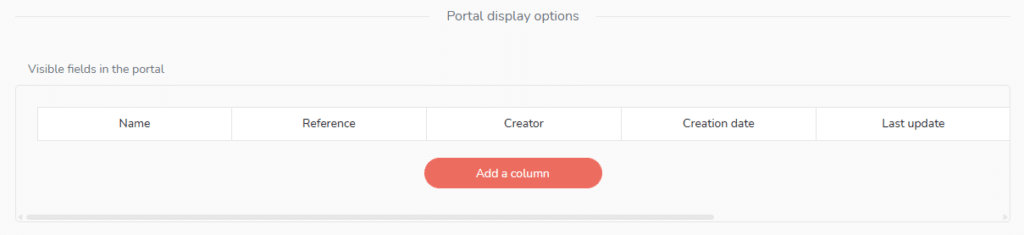
Click on “Add a column” to add a column to your portal:
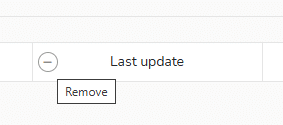
You can also remove a column thanks to the – button that appears on the name of the column when you hover your mouse over it :
Changing the column order
If you can configure the removal and/or addition of columns to your portal, you can also change the display order of the columns, by dragging and dropping them in the settings section to put them in the order that suits you best.
Other portal interface elements
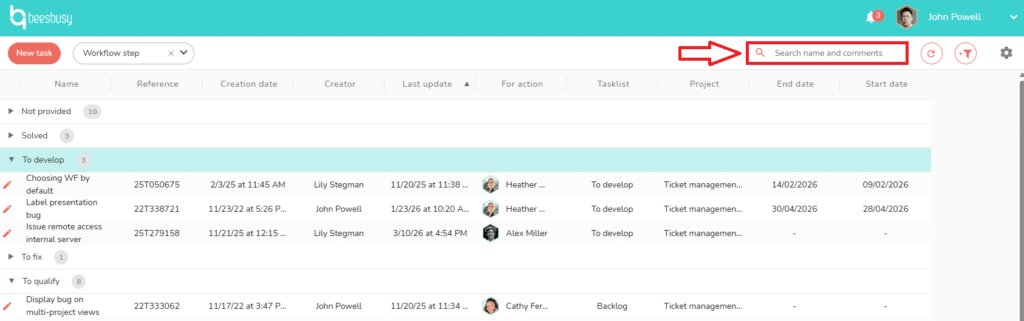
The search tool
A search tool allows you to search within task names and their comments:
Access to the buzz received and sent
In the portal, you can access received and sent buzzes, by clicking on the bell icon at the top right:
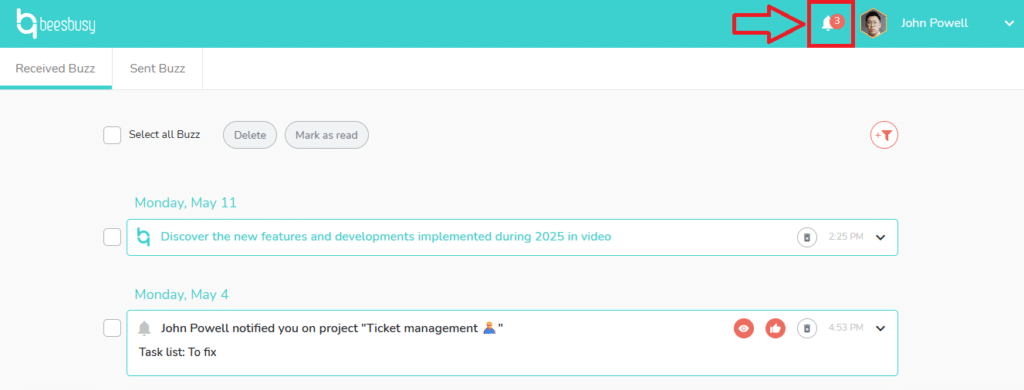
Click on the Beesbusy logo in the top left corner to return to the portal.
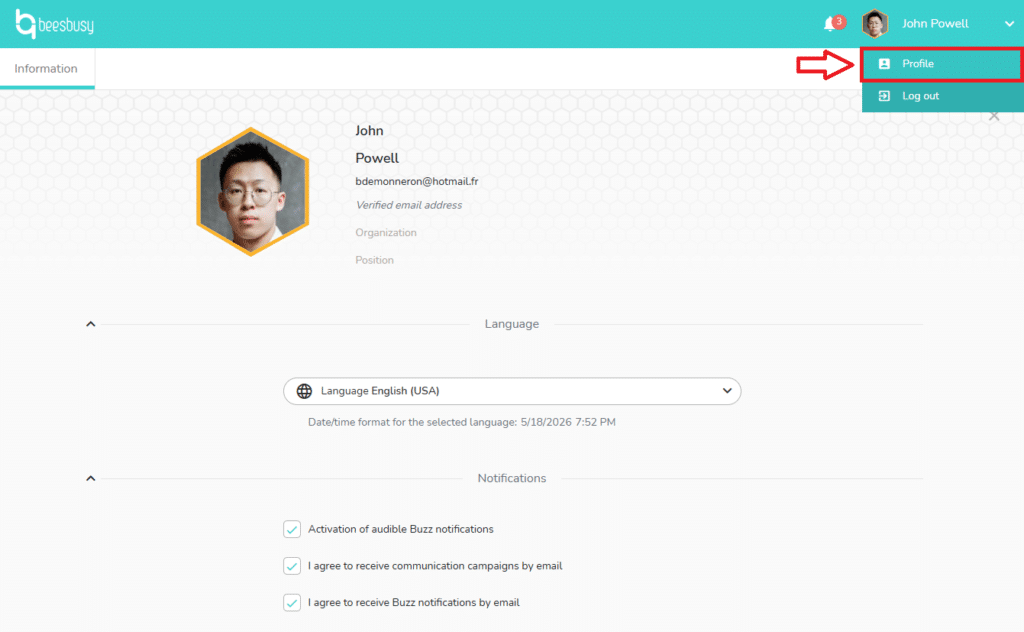
The profile
You can access your profile to change your first and last name, language of use, and notification preferences.
How to create a portal?
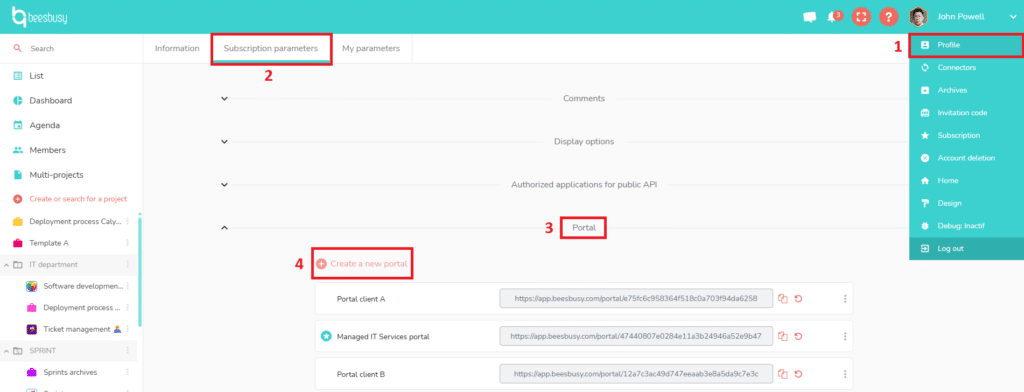
To create a portal, you must be administrator of a Beesbusy subscription .
In your Beesbusy administrator account, go to your Profile (1), accessible from the dropdown menu in the upper right corner, and then to the “Subscription Settings” (2) tab of your profile.
In the “Portal” section (3), click on “Create a new portal” (4):
A settings window will open, with the options described below.
Portal name
This is the name you will give your portal. This allows you to distinguish between the portals when you have several.
Name visible on the portal
If you check the box, the portal name will be visible on the portal, i.e. on the applicants’ interface.
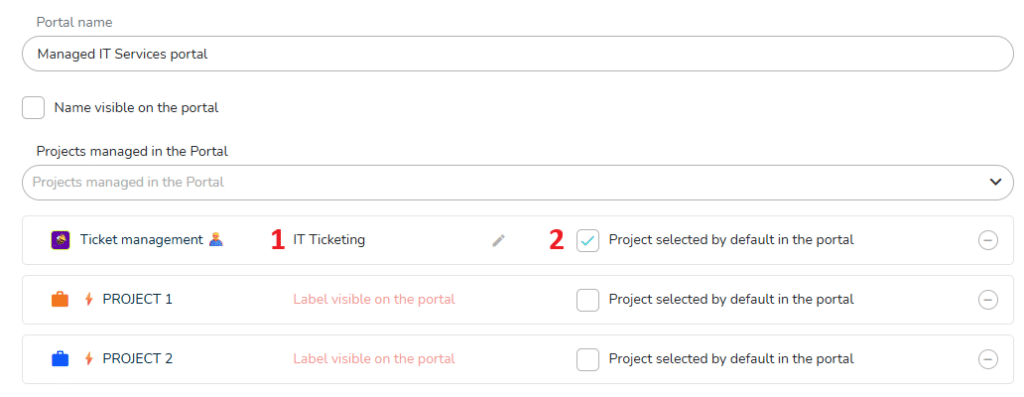
Projects managed in the portal
In the dropdown menu, choose the projects that will be the recipients of the tasks created from the portal, or which project’s tasks can be accessible from the portal.
You can choose how these projects will be named in the portal, thanks to the “Label visible on the portal” field (1).
If you have made accessible various projects, you can choose one project selected by default in the portal (2).
Display only the default selected project
If you chech this option, the users of the portal will be able to create task only in the selected project.
But they will still be able to display the tasks of all the projects managed in the portal.
Authorize the editing or deletion of a comment
If the box is unchecked, the user of the portal can not edit or delete his comments, even if he has modification rights.
If the box is checked, the user of the portal can edit or delete his comments, even if he has read-only rights.
Authorize the deletion of an attachment
If the box is unchecked, the user of the portal can not delete an attachment, even if he has modification rights.
If the box is checked, the user of the portal can delete an attachment, even if he has read-only rights.
Display task number
Here you can choose to display the task number in project or the unique reference number.
To know more about it:
https://www.beesbusy.com/resources/features/project/unique-task-and-project-numbers/
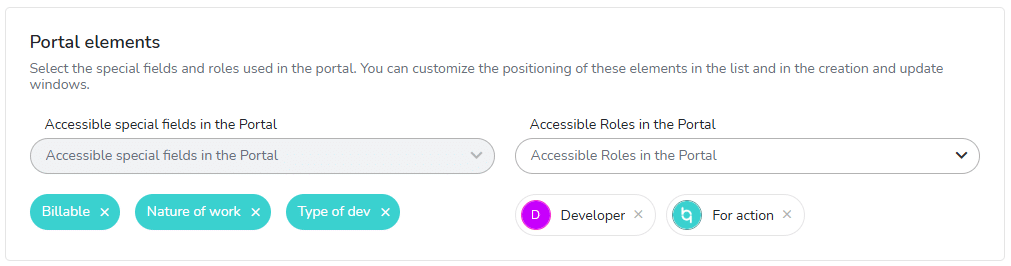
Portal elements
Select the special fields and roles used in the portal. You can customize the positioning of these elements in the list and in the creation and update windows, as explained below.
To know more about the special fields:
https://www.beesbusy.com/resources/features/user-account-profile/special-fields/
To know more about the roles:
https://www.beesbusy.com/resources/features/tasks/roles/
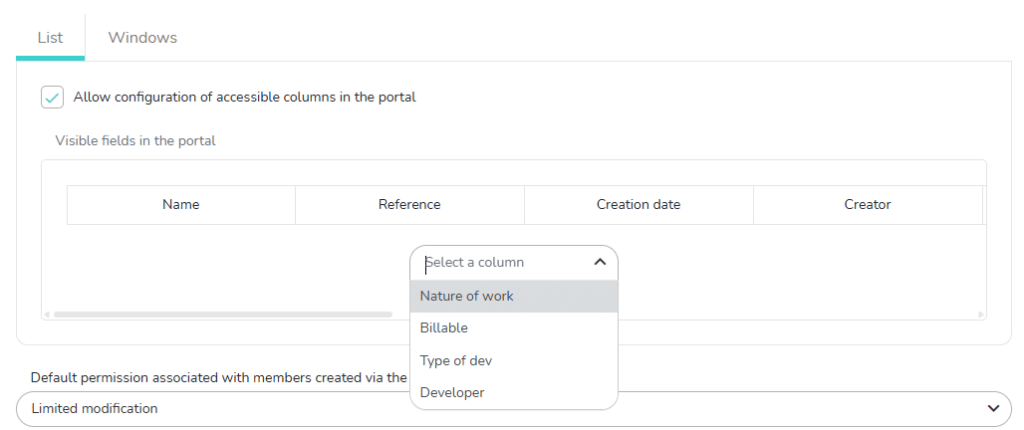
List
Check the box before “Allow configuration of accessible columns in the portal” to allow the user of the portal to organize the columns of his portal, depending on what you have made visible in the portal. He will then be able to add or remove columns, and change their order.
Choose what will be visible in the portal for the users of the portal: you can add columns, like special fields or roles. You can also remove some of the column that are present by default when you create the portal. For exemple the creator of the task. And you can also change the order of the columns by drag and drop.
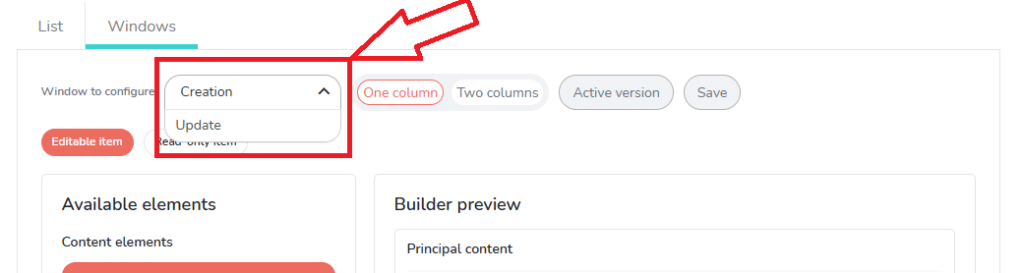
Windows
Here you can configure the following windows:
- Creation of the task
- Update/modification of the task
Switch between both windows configuration thanks to the drop-down menu:
Here it’s how it works:
In the right, in the builder preview, you see the items that will be display in the user’s task in the portal.
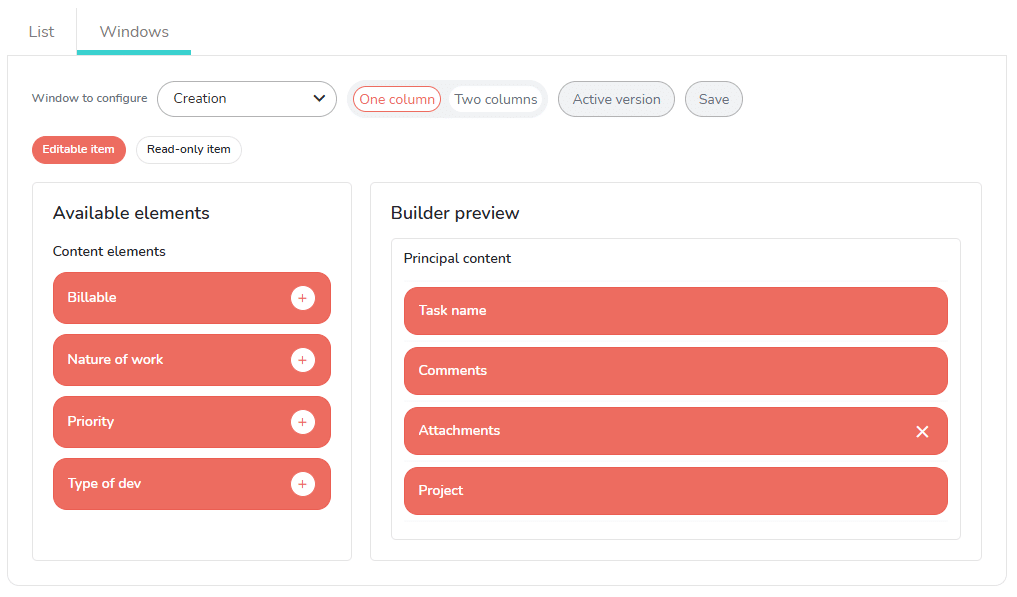
You can remove some items of the user window thanks by clicking on the cross on the right of the item.
On the left, you have a list of available elements. Click on the plus on the right of the item to transfer it to the builder preview, so that it will be visible in the task of the portal user.
In the configuration of the update window, you will see that some items are displayed in the header of the window, and other below the header, in a zone described as “principal content”:
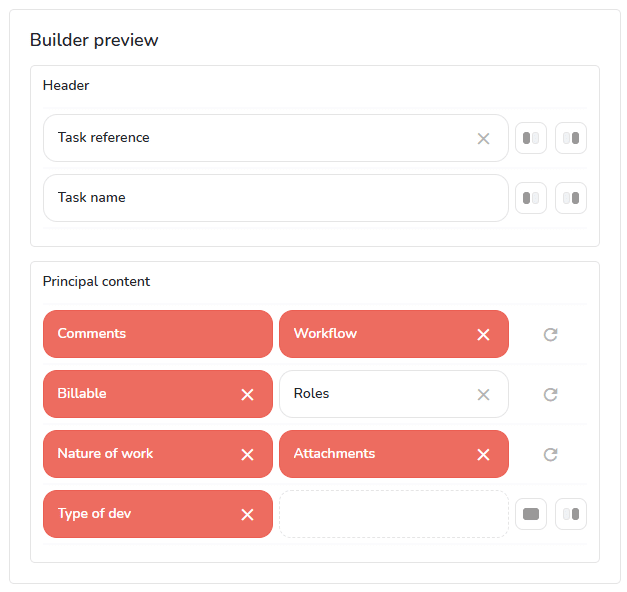
You can also see if the items you choose to display in the window are read-only items (in white) or editable items (in orange). For example, the user of the portal can not edit the date of creation, or the task reference:
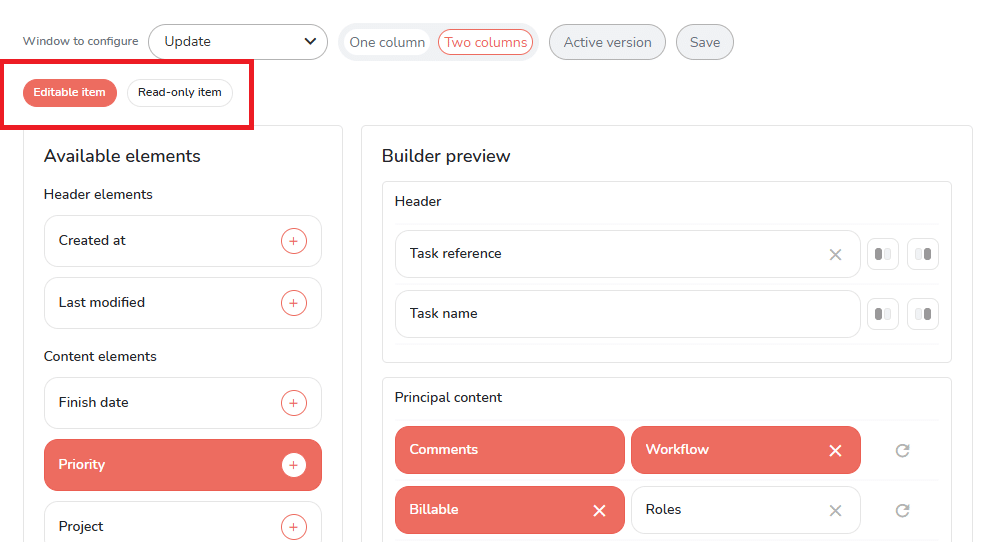
By default, the items are displayed in one column, but if you click on the “Two columns” button, it create a two columns builder:

Use the buttons on the right of the items to choose how to place the items in the columns:

- Place on the left column:

- Place on the rigth column:

- Use full width:

- Swap row order if you have already one item on the left, and anoter on the right, in the same row:


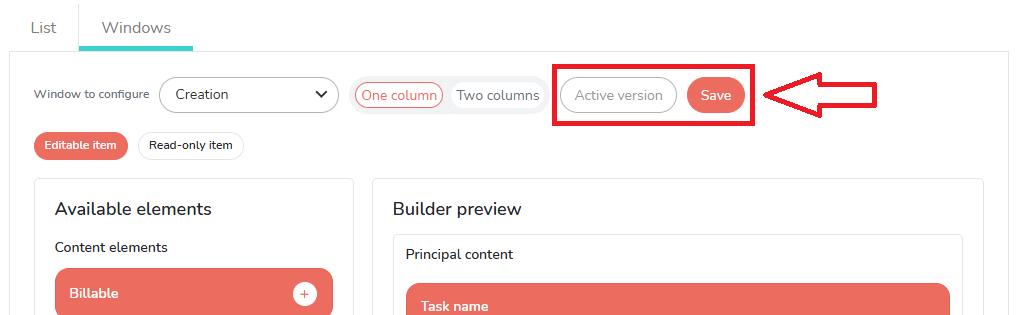
Last, don’t forget to click on “Save” to save your modifications. Or click on “Active version” to reorder things as they were before:
Default permission associated with members created via the portal
Choose wich rights will have the members on the projects managed in the portal.
To know more about the rights of the members on projects, please read the following article:
https://www.beesbusy.com/resources/features/project/share-project-with-members-manage-access-rights/
Default automatic subscriptions to Buzz for new portal users
Configure which automatic notifications the user will receive.
To know more:
https://www.beesbusy.com/resources/features/project/automatic-notifications-in-a-project/
New portal user management
When someone log into a portal, he is automatically added:
- To the member list of the manager of the subscription (and manager of the portal).
- To the projects managed in the portal, with the rights you have configured in the “Default permission associated with members created via the portal” section.
Link generation and regeneration
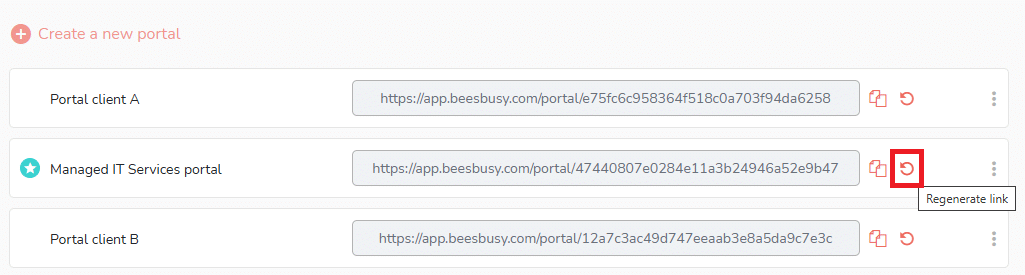
When you click on the “Create a portal” button, you generate a web page. The link is now accessible and you can comunicate it to whoever needs to use the portal.
If you click on the “Regenerate link” button, you will change the url of the web page. This will have no effect on the portal settings, but the previous link is no longer working.
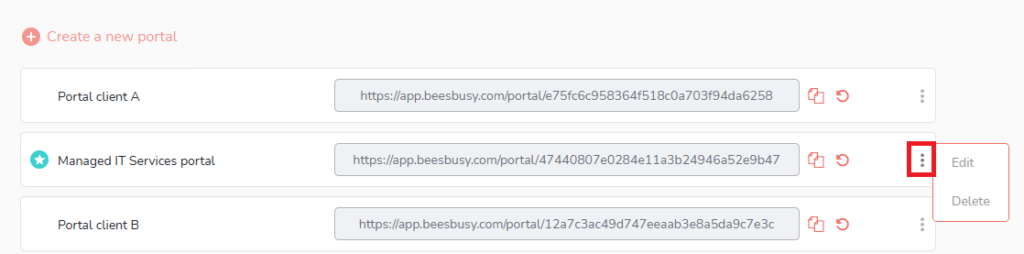
How to edit or delete a portal?
In the portal section of the Subscription parameters, you access all you portals.
Click on the three dots menu on the right to edit or delete a portal.