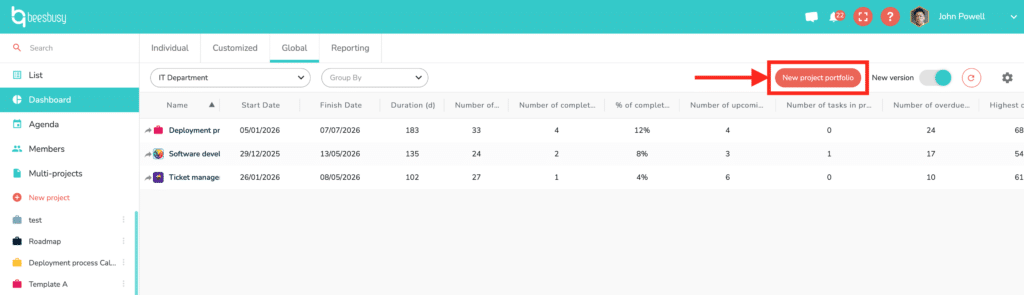
The new Global dashboard
You can access the Global dashboard by clicking on “List” in the upper left corner of Beesbusy, then select the “Projects” tab.
In the Global dashboard, you can create portfolios of projects. The projects your selected are displayed in a list within a table composed of several columns:
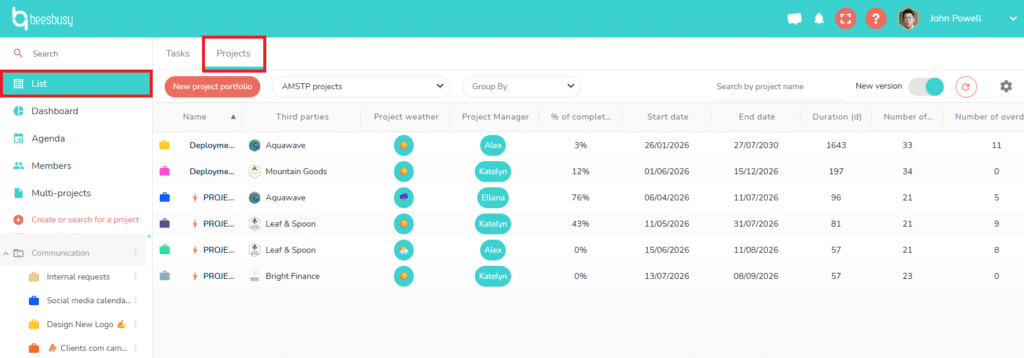
You can create multiple portfolios according to your needs and customize them as shown below.
Create and structure your portfolios
Create a new portfolio
To create a new portfolio, click the “New project portfolio” button in the upper right corner.
A window will pop up, asking you to name this new portfolio, select which projects will be in the portfolio, and if you filter on members or choose all members (by default option).
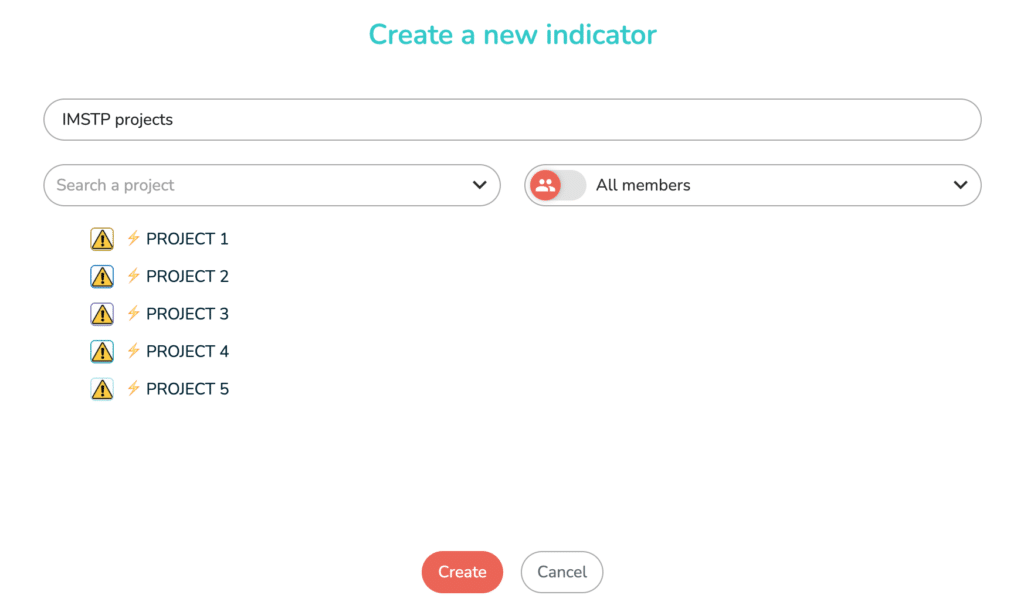
Once you have named the new portfolio and chosen the projects, click on “Create”.
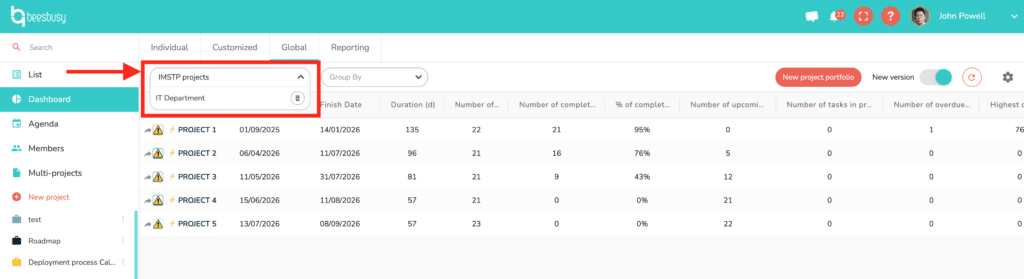
In the portfolio dropdown menu, you select the portfolio you want to display.
This menu also allows you to delete a portfolio of your choice by clicking on the trash can to the right of the porfolio name, except for the one currently being displayed.
Configure your portfolios
To configure a portfolio, you must:
- Select the desired portfolio from the drop-down menu.
- Access the portfolio settings by clicking the gear icon in the upper right corner.


You can also do the reverse:
- Access the settings of the currently displayed portfolio by clicking the gear icon in the upper right corner.
- Select the portfolio you want to configure from the drop-down menu.
Here is the settings interface for a portfolio:
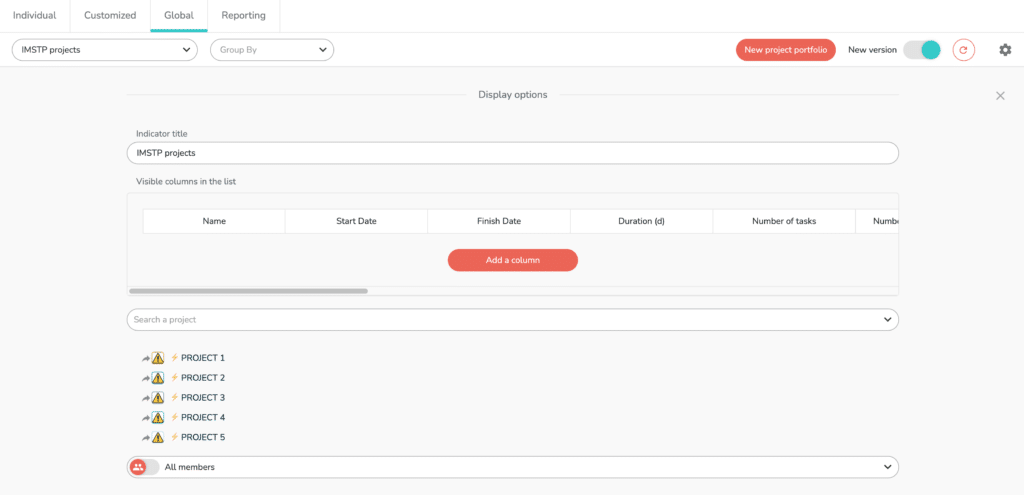
In the settings, you can:
- Change the name of your portfolio.
- Add columns by clicking the “Add a column” button. The dropdown menu allows you to choose:
- The special fields of your projects.
- The roles available on your projects.
- The third parties of your project.
- The task special fields available on your project.
- The administrators of the project.
- Etc.
- Remove columns: hovering your mouse over a column name will display a button (-) to remove the column. Some columns cannot be removed:
- Name.
- Start date.
- End date.
- Duration.
- Change the order of the columns by dragging and dropping them into the column settings area.
Once you have made your changes, click the cross in the upper right corner to exit the settings. The settings are saved automatically.
Customize the data display in the portfolio
In a portfolio, you can customize the display in different ways.
Sorting in portfolio
Click a column header to sort tasks by that criterion.
For example, if you want to see all tasks sorted by due date, click “End Date.”
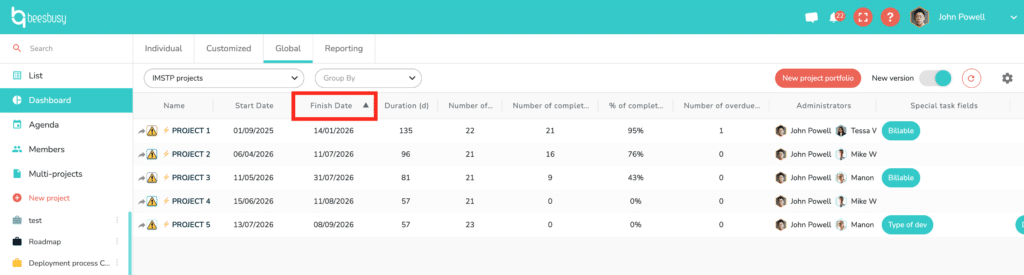
You will then see projects sorted by due date, with the oldest at the bottom of the portfolio. Click the “End Date” column header again to reverse the order.
Grouping
Using the “Group by” dropdown menu, you can display tasks grouped by:
- Project special fields
- Third parties
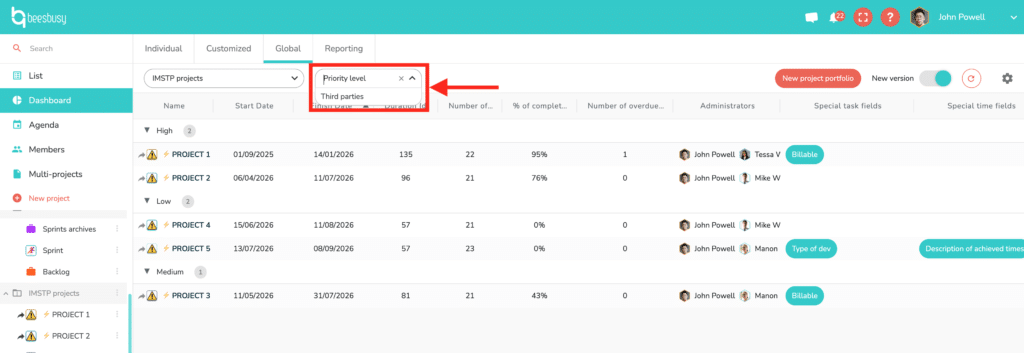
If applicable, the selected column sorting will be applied to each grouping.
Editing the special fields and/or the roles
You can also edit the special fields and or the roles directly in the dedicated column.
In a project line, click on special field or role you want to edit. A pop up opens, allowing you to modify the values.
To learn more about special fields, you can consult the online help article on the subject by clicking here:
https://www.beesbusy.com/resources/features/user-account-profile/special-fields/
To learn more about roles, you can consult the online help article on the subject by clicking here:
https://www.beesbusy.com/resources/features/tasks/roles/
Column width
You can change the column widths by dragging and dropping the vertical lines separating the headers.
This allows you to adjust the column display to the number of columns, or to make certain information more readable depending on your needs.