The project display options
Project > ![]() “Settings” icon in the top right corner of the window. Go to the “Display option” section.
“Settings” icon in the top right corner of the window. Go to the “Display option” section.
You can configure the following options:
- Display start date, end date, or duration on tasks.
- Display third parties.
- Displayed tab when opening a task.
- Displayed side panel when opening a task.
- Display project name and labels.
- Display task number.
- Display completed tasks in the What view.
- Reduce non-working time slots on When and Who views.
- Thicken task borders (When and Who views).
- Display members and task name or task completion (When view).
- Only display tasks inside visible time period (When and Who views).
- Make tasks transparent to highlight timelogs (Who view).
- Display only the members concerned by the filter (Who view).
- Display budget with timelogs (Who tab of a task).
If you wish to apply these choices to all the projects you’ve created, go to Profile>My Settings>Default display options for projects.
Display of start, end or duration dates on tasks
You can choose to display one of the following information on the tasks of the project you are on:
- The start date of the task.

- The end date of the task.

- The duration of the task.

This option applies to all views of the project in question.
Display members or third party on tasks
If you choose to display the third party, you will see the third party in place of the member:
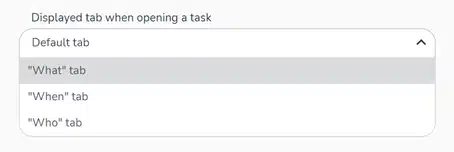
Displayed tab when opening a task
This option lets you define the tab that appears by default when you open your tasks.
To do this, choose one of the 3 tab views available:
Displayed side panel when opening a task
You can define a default panel when you open project tasks.

You can choose from the following options:
- Default panel.
- Subtasks.
- Links.
- Actions.
- Meeting.
- Labels.
- Timelogs.
- Budget.
- Special fields.
- Recurrence.
- Workflows.
- Third parties.
- Historic.
Display project name and labels
By checking this option, you can pin the title of your project to the top of the page, along with the caption for your labels.
Only labels meeting one of the following criteria are displayed:
– Label with customized name.
– Label present on a task (even a completedtask).
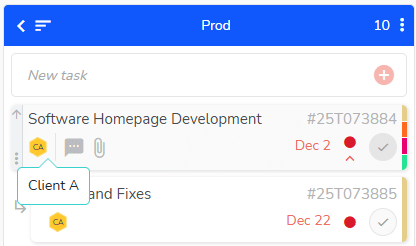
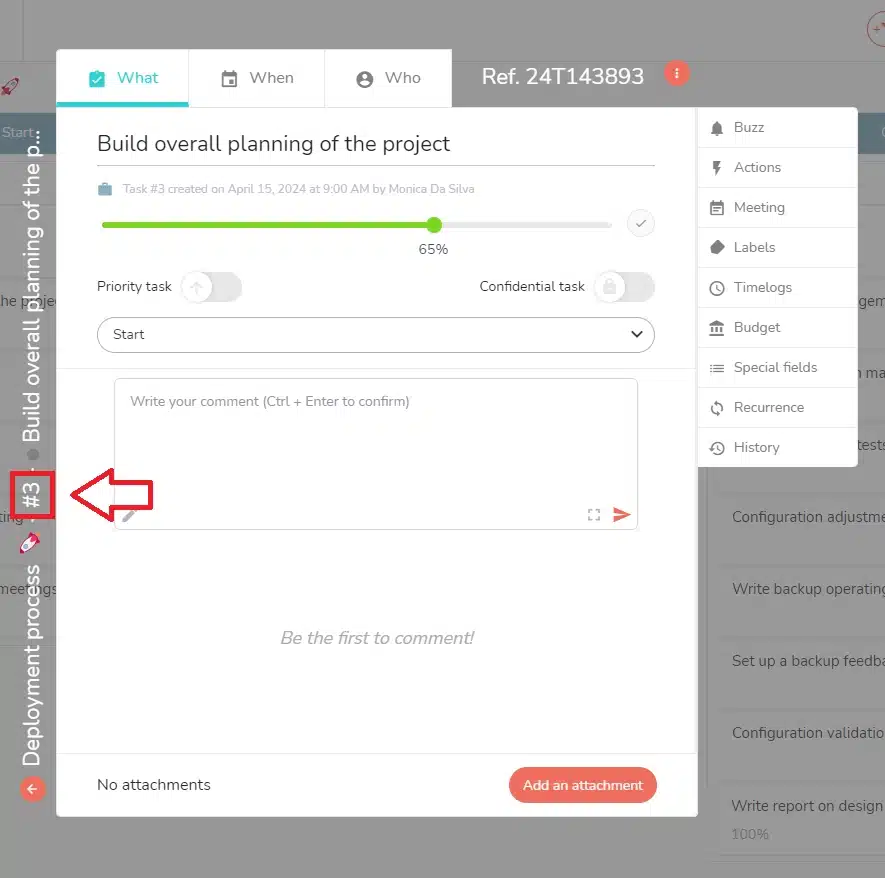
Display task number
The numbers are incremented as tasks are created. 1 is the first task created in the project, 2 is the second task created in the project, etc.

These numbers can be read in two places:
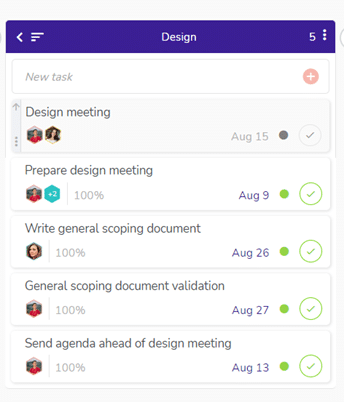
- On tasks in the What view:


- When opening the task, on its side:
If you delete a task from the project, its number is deleted at the same time. This means that this number will no longer be assigned to a task in this project.
For example, if you delete the task number 2, the numbering will be changed from 1 to 3 in the project, and there will never be a task number 2 in this project again: the task number is linked to the task, it is a fixed data.
If the administrator of your Beesbusy subscription allows it, you can also choose to display the unique reference number. To know more about it, please read the article about unique task and project numbers.
Display completed tasks in the What view
When a task has been set to “completed” status, it is by default classified in the Completed tasks tab, located at the bottom of the relevant task list.
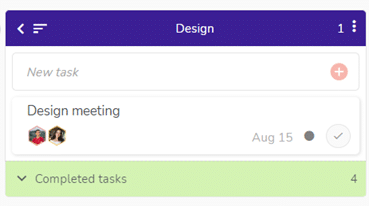
You can keep your completed tasks visible in your task list.
To do, check the “Display completed tasks in the What view” option.
Your completed tasks will then be kept in the task list and marked with a green dot to indicate their status.
Reduce non-working time slots on When and Who views
By checking this option, you reduce the display (in the When and Who views) of the planning areas indicated as “not worked” in the project settings. If you schedule a task on an “off” day or time, the size of this task will be reduced.
For more information, see the article dedicated to the hours and days worked for a project.
This option allows you for example to reduce the display of Saturday and Sunday
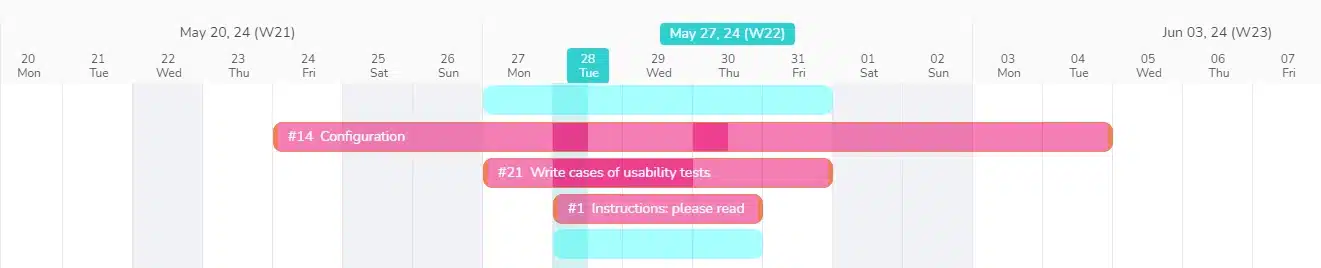
Thicken task borders (When and Who views)
By checking this option, you can thicken the borders of tasks in the When and Who views, giving you better visibility of their location.
Display members and task name or task completion (in the When view)
You can define how your tasks are displayed in the When view by choosing between the following 3 modes:
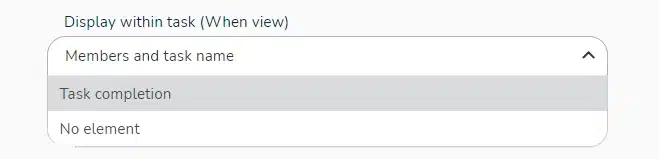
- Member and task name: you will see the member and task name on the task in the Gantt chart, but also the labels.
- Task completion: you will see the percentage of completion on the task in the Gantt chart.
- No element: for a light display of the Gantt chart, no information will be added to the tasks on the schedule.
Only display tasks inside visible time period (When and Who views)
By checking this option, you can display only those tasks that are scheduled for the period you are viewing in the schedule. This allows you to optimize loading times for large projects.
Plus, thanks to the drop down menu, you can choose to reduce the visible period when you display timelogs in the Who view, thus excluding tasks that you are currently not working on.
Make tasks transparent to highlight timelogs (in the Who view)
You can apply a transparency effect to your tasks in the Who view, making it easier to read the times you’ve scheduled, which will be colored.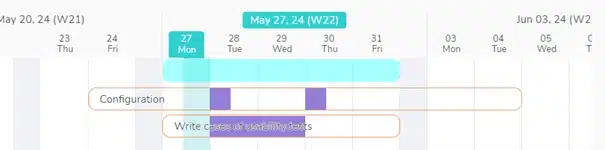
Display only the members concerned by the filter (Who view)
If you check this display option, in the Who view, members that are not concerned by an active filter will not be displayed. For exemple, if you filter on a label, and “Mister X” member is not assigned to any task with this label, he will not be displayed on the view. Thus allowing you to see easily who is concerned by the filter.
Display budget with times (Who tab of a task)
To learn more about budgets, watch the video explaining the feature: