Where to select the synchronization that suits you
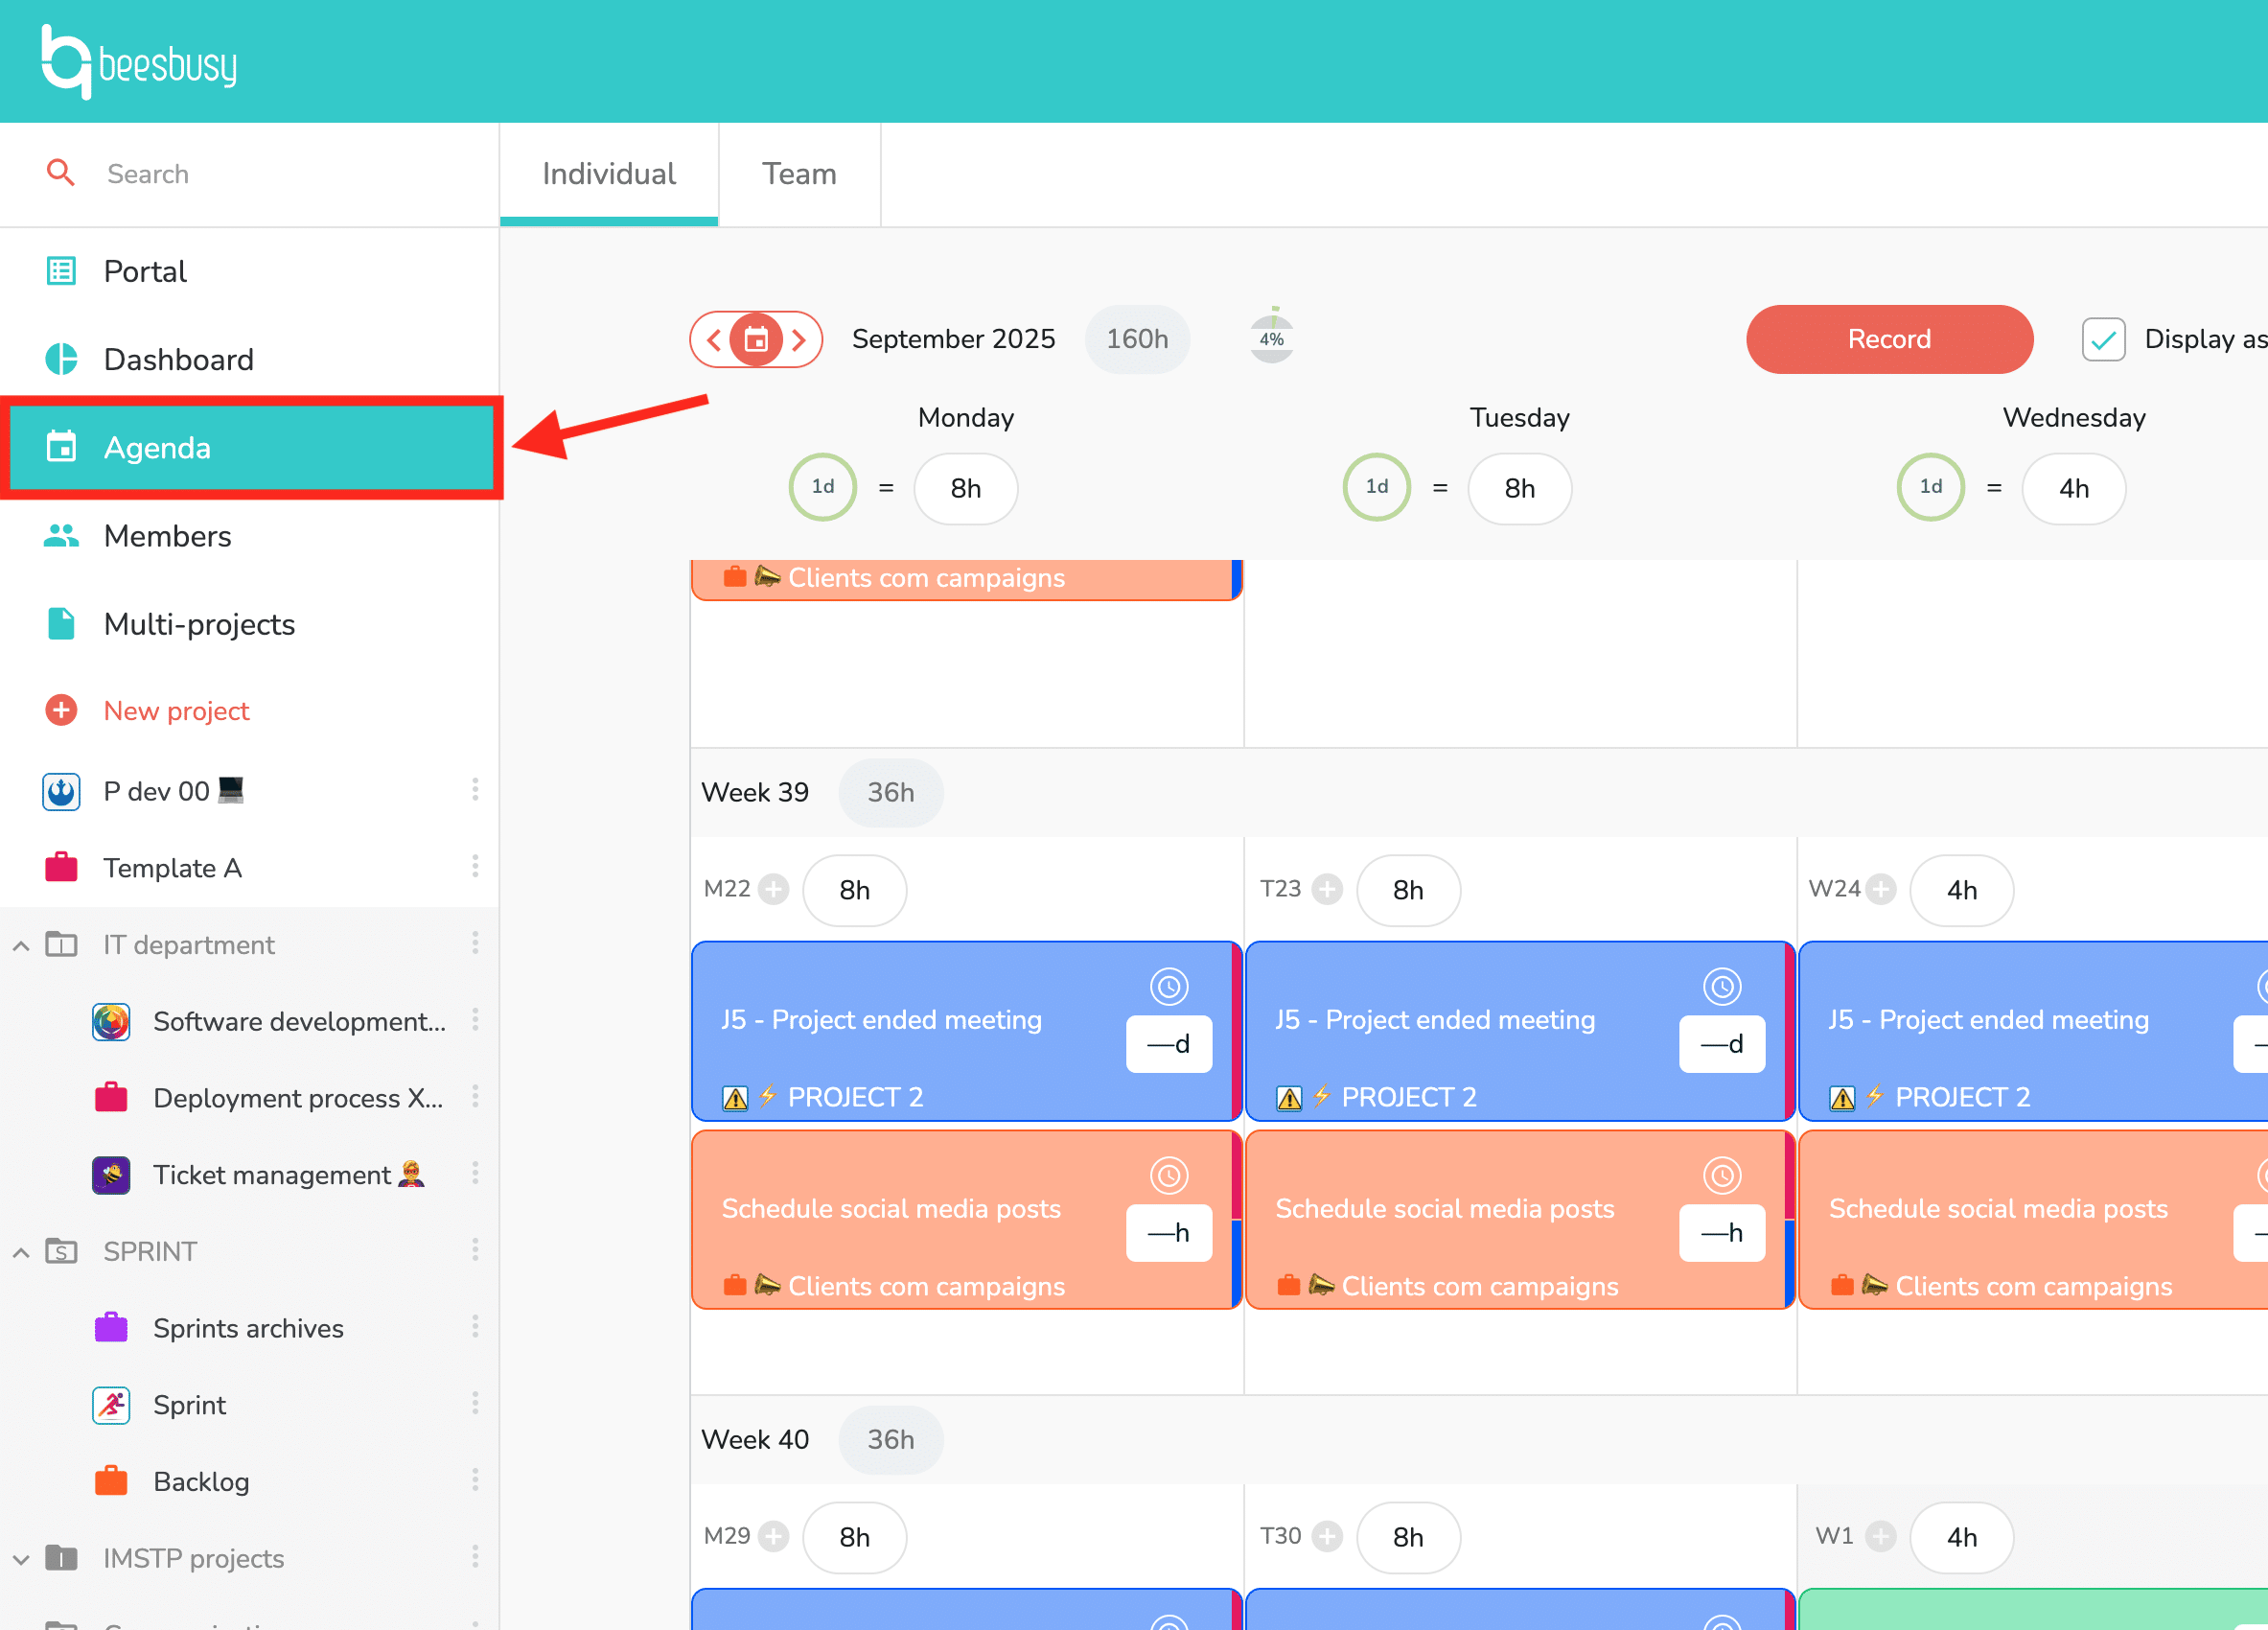
To synchronize your tasks, click on Agenda on the left column of your account. Then select the “Individual” tab. You will access your agenda for the current month, gathering the tasks you are assigned to.
Open the synchronization panel by clicking on the synchronization symbol at the top right:
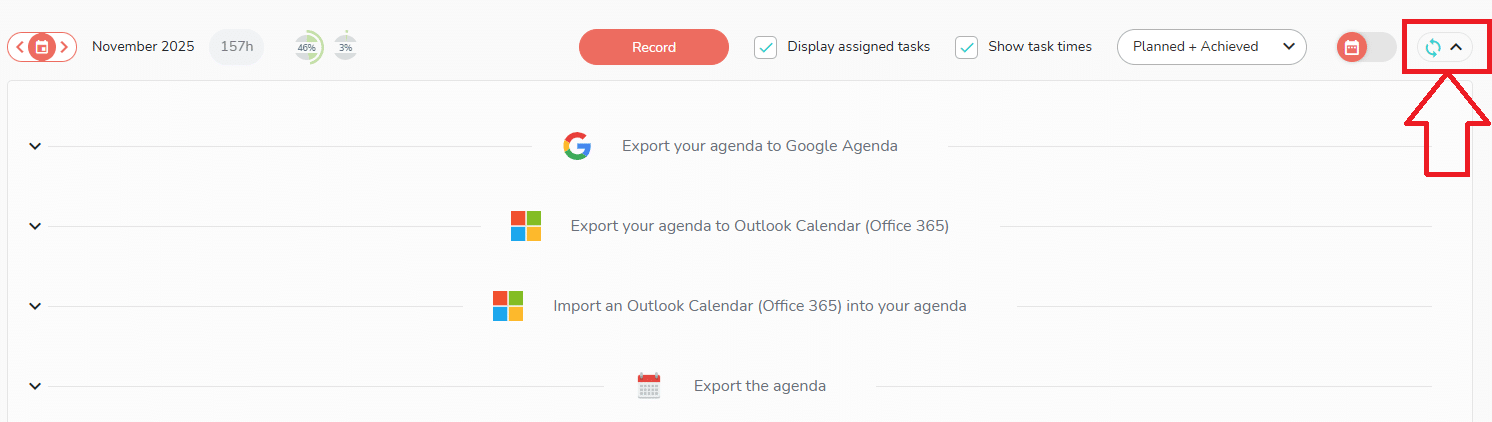
You have various synchronization options in this panel:
- Export your agenda to Google Agenda.
- Export your agenda to Outlook Calendar (Office 365). You can choose between:
- Generate two calendars in Outlook: a “Beesbusy tasks” calendar and a “Beesbusy times” calendar.
- Synchronize Beesbusy times directly in your main Outlook calendar.
- Import an Outlook Calendar (Office 365): the Outlook meetings will be imported in your Beesbusy agenda, and will impact your occupancy rate.
- Export the agenda: generation of an .ics file
First synchronisation
When this is your first synchronization, you must log in to your Google or Microsoft account. An authorization request message for Beesbusy to access to your Microsoft or Google account appears, and you must give consent.
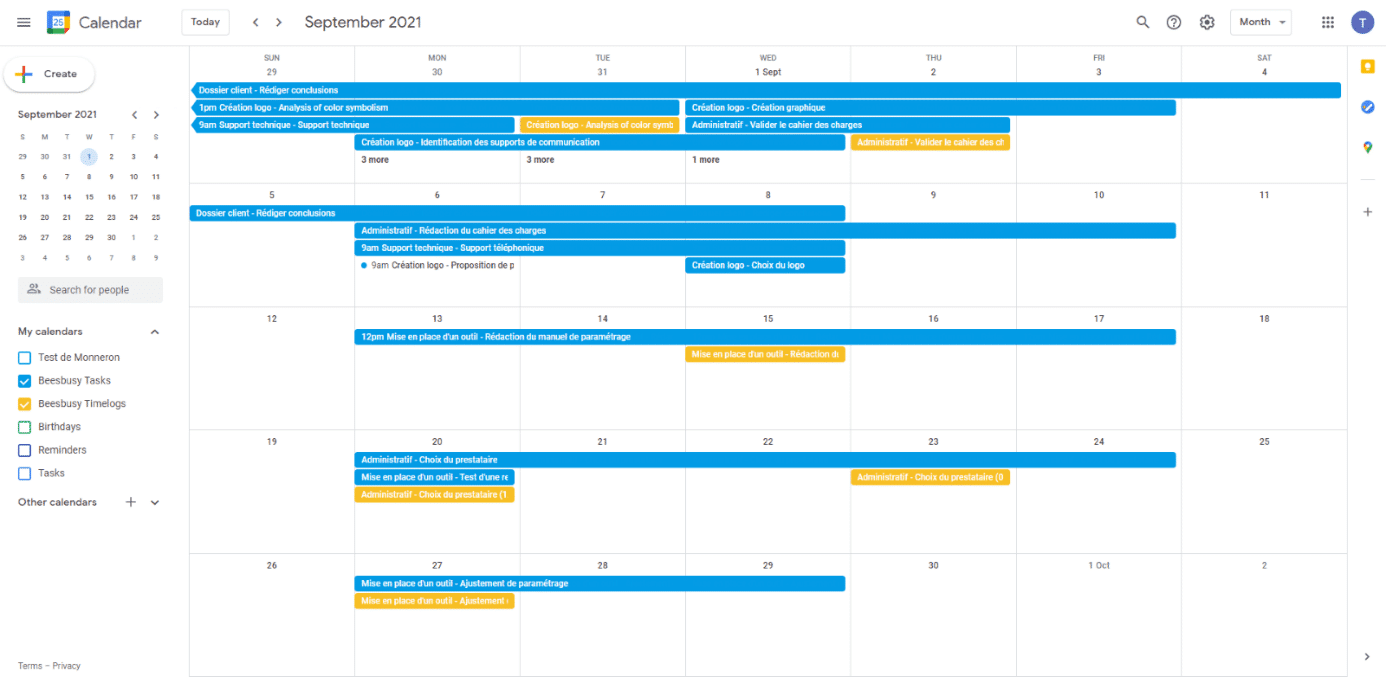
Choose which agenda to display in Google agenda or Outlook calendar
All tasks on your Beesbusy agenda are then visible in your Google agenda or Outlook calendar. Two agendas have appeared: “Beesbusy tasks”, which displays the tasks assigned to you, and “Beesbusy timelogs”, which displays your planned forecast workload.
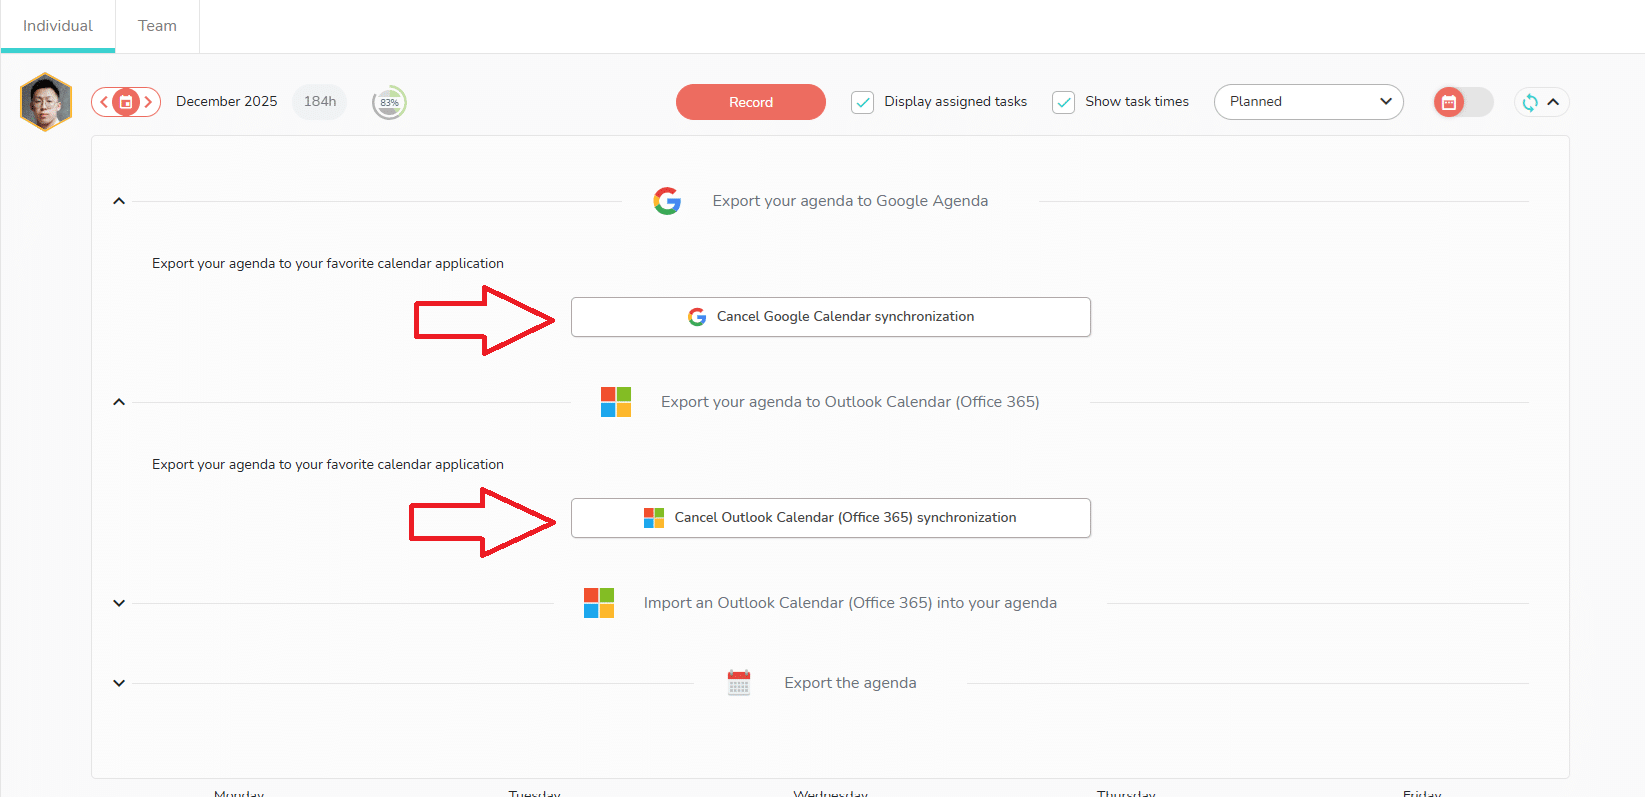
Cancel the synchronization
You can cancel the synchronization of your Beesbusy calendar with Google Calendar or Outlook Calendar at any time by clicking on the cancel synchronization button accessible directly in the syncrhonization panel: