What is the documentary base?
The documentary base of a project allows to:
- View all the attachments that have been assigned to this project or to tasks in this project.
- Manage the attachments (add, delete, preview).
Viewing the documentary base
To access all the attachments assigned to the tasks of a project, go to the project of your choice, and click on the paper clip at the top right of your screen.![]()
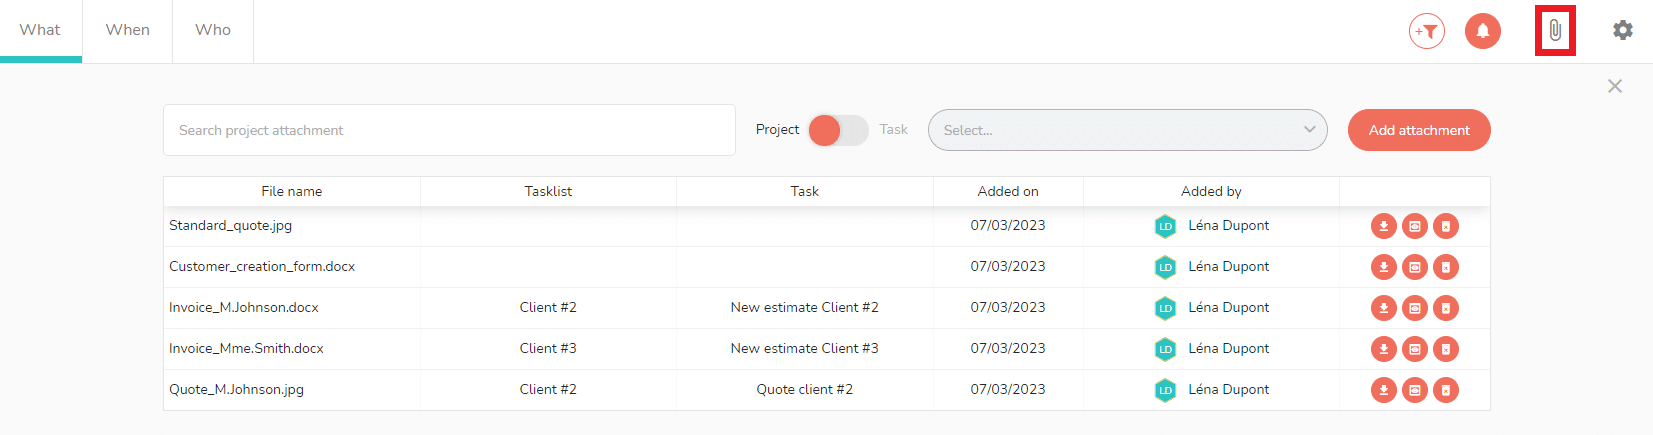
You can distinguish between:
- The attachments assigned to tasks with names in the “task” column on the board.
- The attachments added directly to the project without a name in the “task” column.
It is possible to preview some attachments by clicking on eye icon at the right of the lines of the attachements. Only certain formats allow previewing:
- Image/bmp.
- Text/htm.
- Text/html.
- Image/jpg.
- Image/jpeg.
- Application/pdf.
- Image/png.
- Image/tiff.
- Text/plain.
Attachments can be downloaded by clicking on the downward arrow icon.![]()
If you cannot find an attachment, you can search for it by words or numbers using the search bar at the top of the documentary base:

Managing the documentary base
Adding documents to a project
You can add attachments to the project from the documentary base.
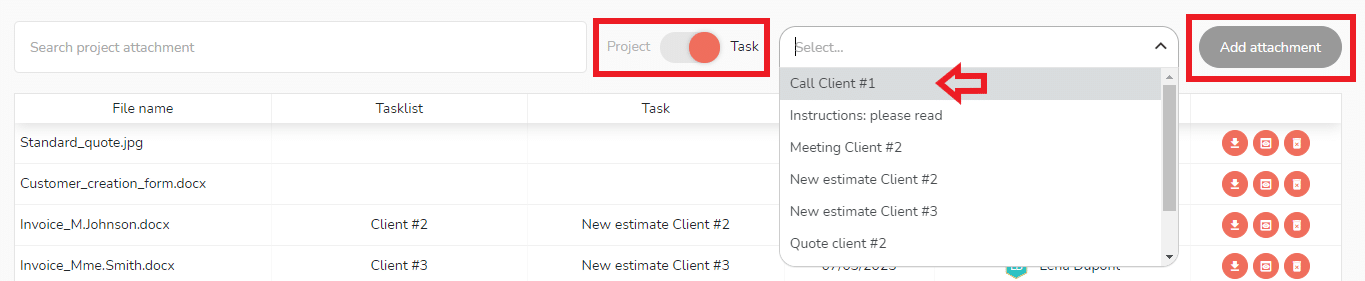
To do this, go to the project’s documentary base and click on the “Add attachment” button, with the selector positioned on “Project”.

You can choose between:
- Add a file.
- Add a link.
Add a file
To add a file, simply click on “a file” and a window will appear to select the file that is saved on your computer.
Once selected, the attachment will be displayed on the document base with a download icon to open the file.

Add a link
To add a link, click on “Add a link”. This window will appear:
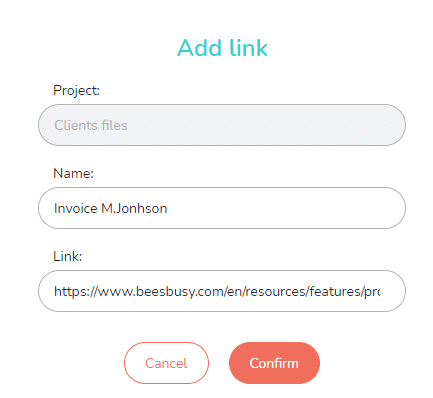
Fill in the “Name” and “Link” fields, then click “Confirm”.
As with adding a file, the link will be displayed in the document database with an arrow pointing right icon to open the link.

Adding documents to tasks from the documentary base
You can also add documents to tasks from the documentary base.
To do this, go to the project’s document database and click on the “Add attachment” button, with the selector positioned on “Task”.
You can then select the task to which you want to add the attachment.
To manage attachments directly in the project tasks, please click on the following link: https://www.beesbusy.com/resources/features/tasks/attachment-task/
Deleting a document from the documentary base
To delete documents from a project, go to the documentary base for that project and click on the bin at the right of the desired document.![]()

Good to know: deleting a document is permanent.
Displaying attachments according to user rights
- Limited read-only: members with “limited read-only” status on the project can only see the attachments of the tasks assigned to them.
- Limited edit: Members with “limited edit” status on the project can read and add attachments only on the tasks assigned to them. They can only delete attachments they have added.
- Read-only: Members who are “read-only” on the project can view all attachments but cannot delete or add them.